Entra ID & Access Management

Overview
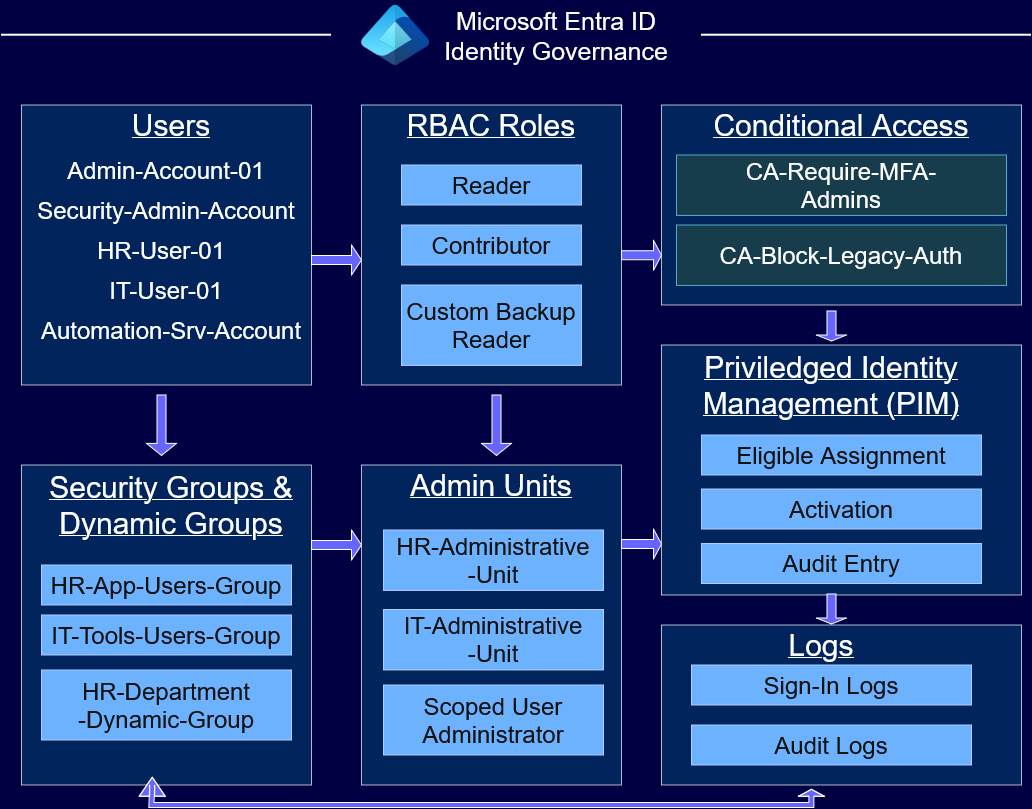
This project builds a simulated enterprise identity governance environment inside Microsoft Entra ID. It demonstrates how organizations manage identities, secure privileged access, enforce Conditional Access, automate group membership, and apply least‑privilege principles at scale.
Architecture Diagram
Project Screenshots
Methodologies Used
Identity Lifecycle Management
Group‑Based RBAC
Dynamic Group Automation
Conditional Access Enforcement
Privileged Identity Management (PIM)
Custom Role Design
Audit & Sign‑In Log Analysis
Step-by-Step Walkthrough
NOTE: The identities used in this project are intentionally generic. The actual identities I used in this lab- along with any other sensitive identifiers, have been redacted.
1. Pre‑build Setup
Prepare the tenant, permissions, licensing, and naming conventions for the identity governance lab.
- Confirm you are in the correct Microsoft Entra ID tenant.
- Ensure your main account is a Global Administrator or Role Administrator.
- Enable the Entra ID P2 trial under Licenses → All products.
- Assign P2 to your main admin, at least one test admin, and optionally one standard user.
- Apply an enterprise‑style naming convention (e.g. Admin‑Account‑01, HR‑User‑01).
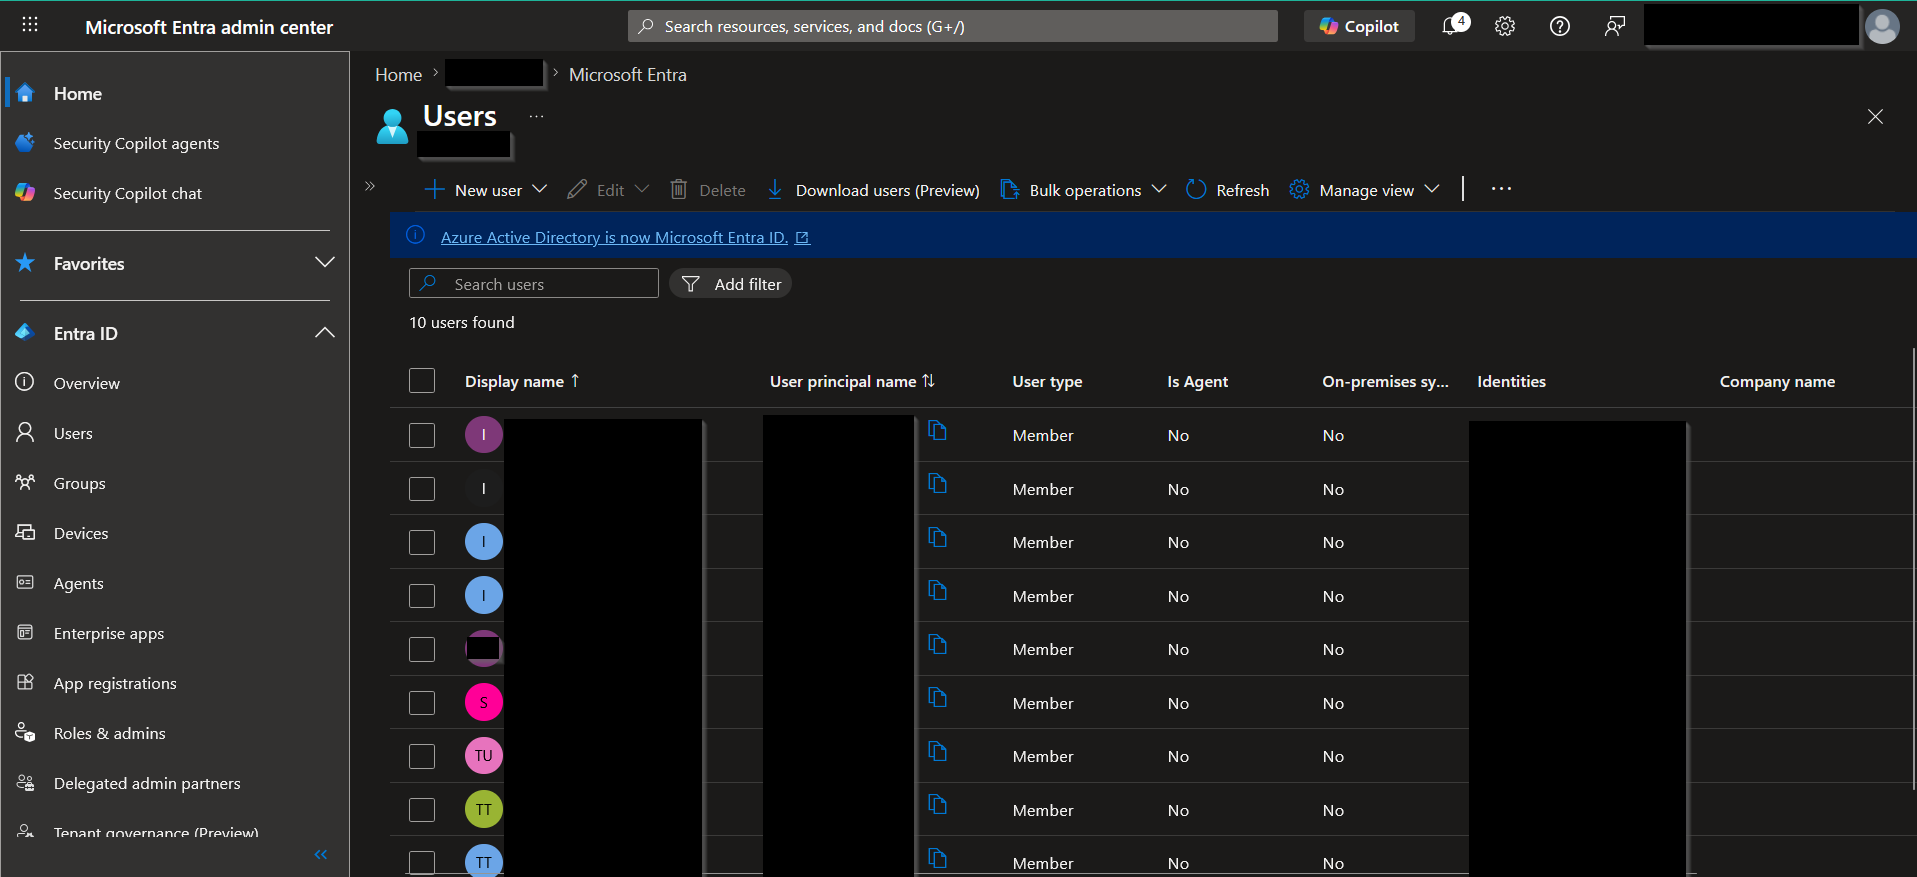
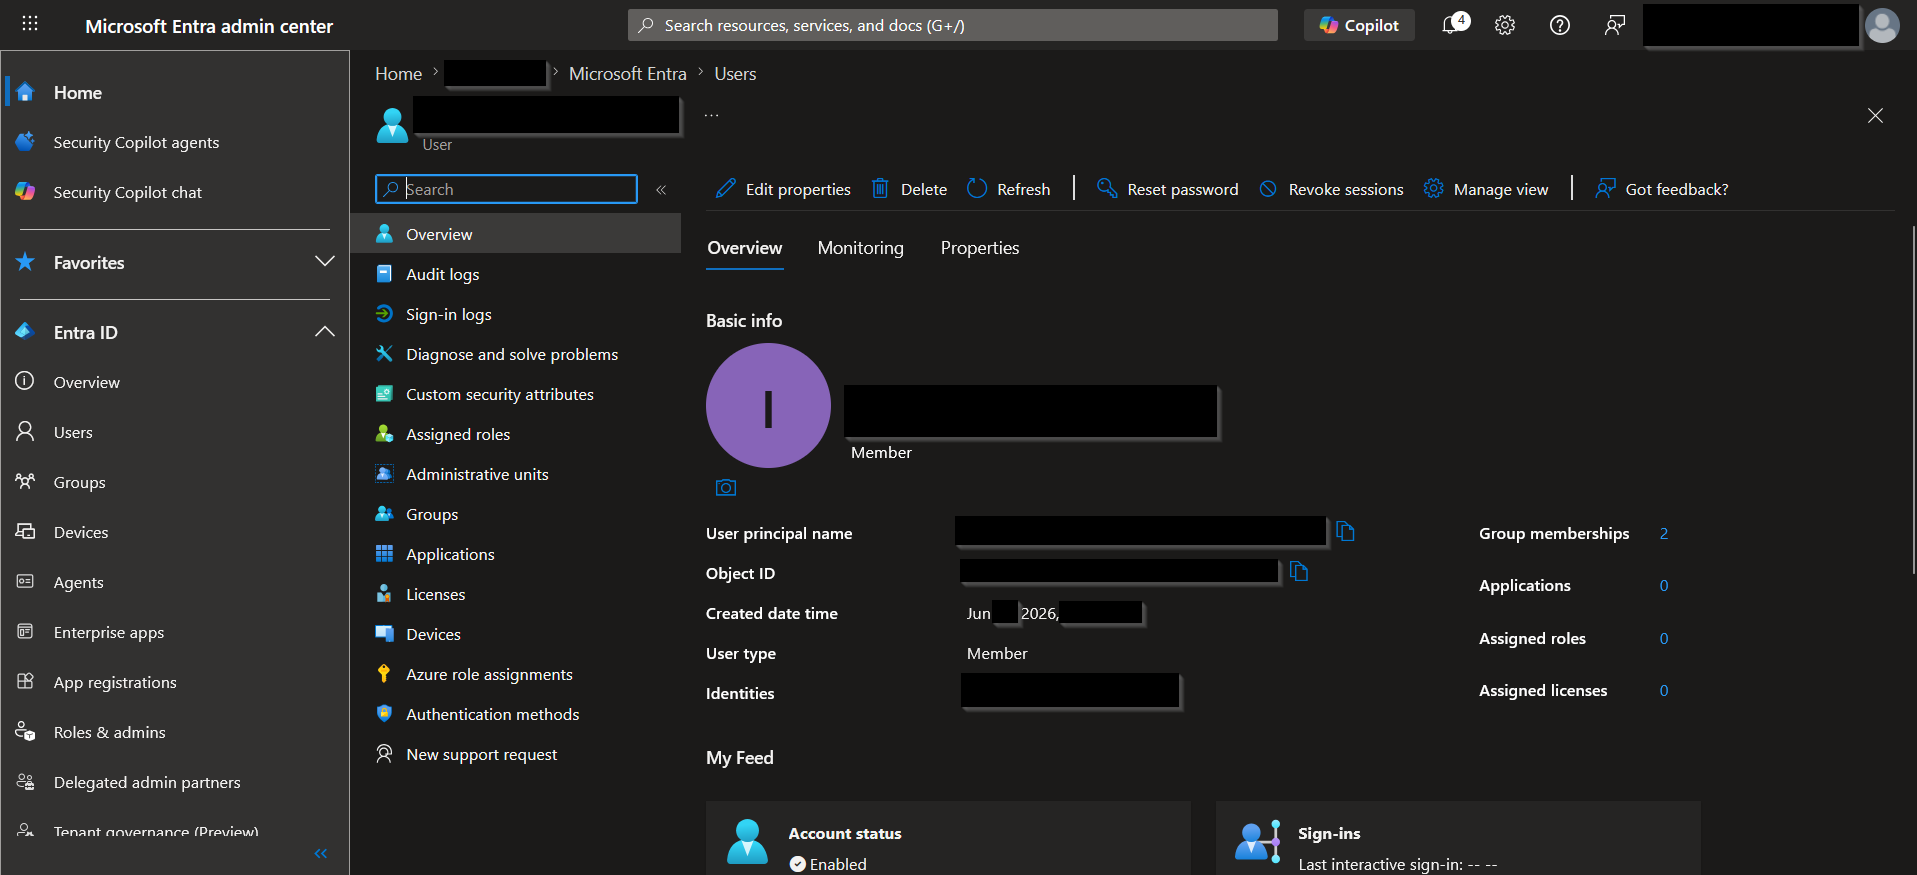
2. Create Core Users
Build the foundational identity set representing admins, staff, and service accounts.
- Navigate to Entra ID → Users → New user.
- Create:
- Admin‑Account‑01 (Global Administrator)
- Security‑Admin‑Account (Security Administrator)
- HR‑User‑01 (HR staff)
- IT‑User‑01 (IT staff)
- Automation‑Service‑Account (Service account)
- Set usage location, department, and job title for each user.
- Enforce strong password settings.
3. Create Security and Dynamic Groups
Organize users into static and dynamic groups to support RBAC and automation.
- Go to Entra ID → Groups → New group.
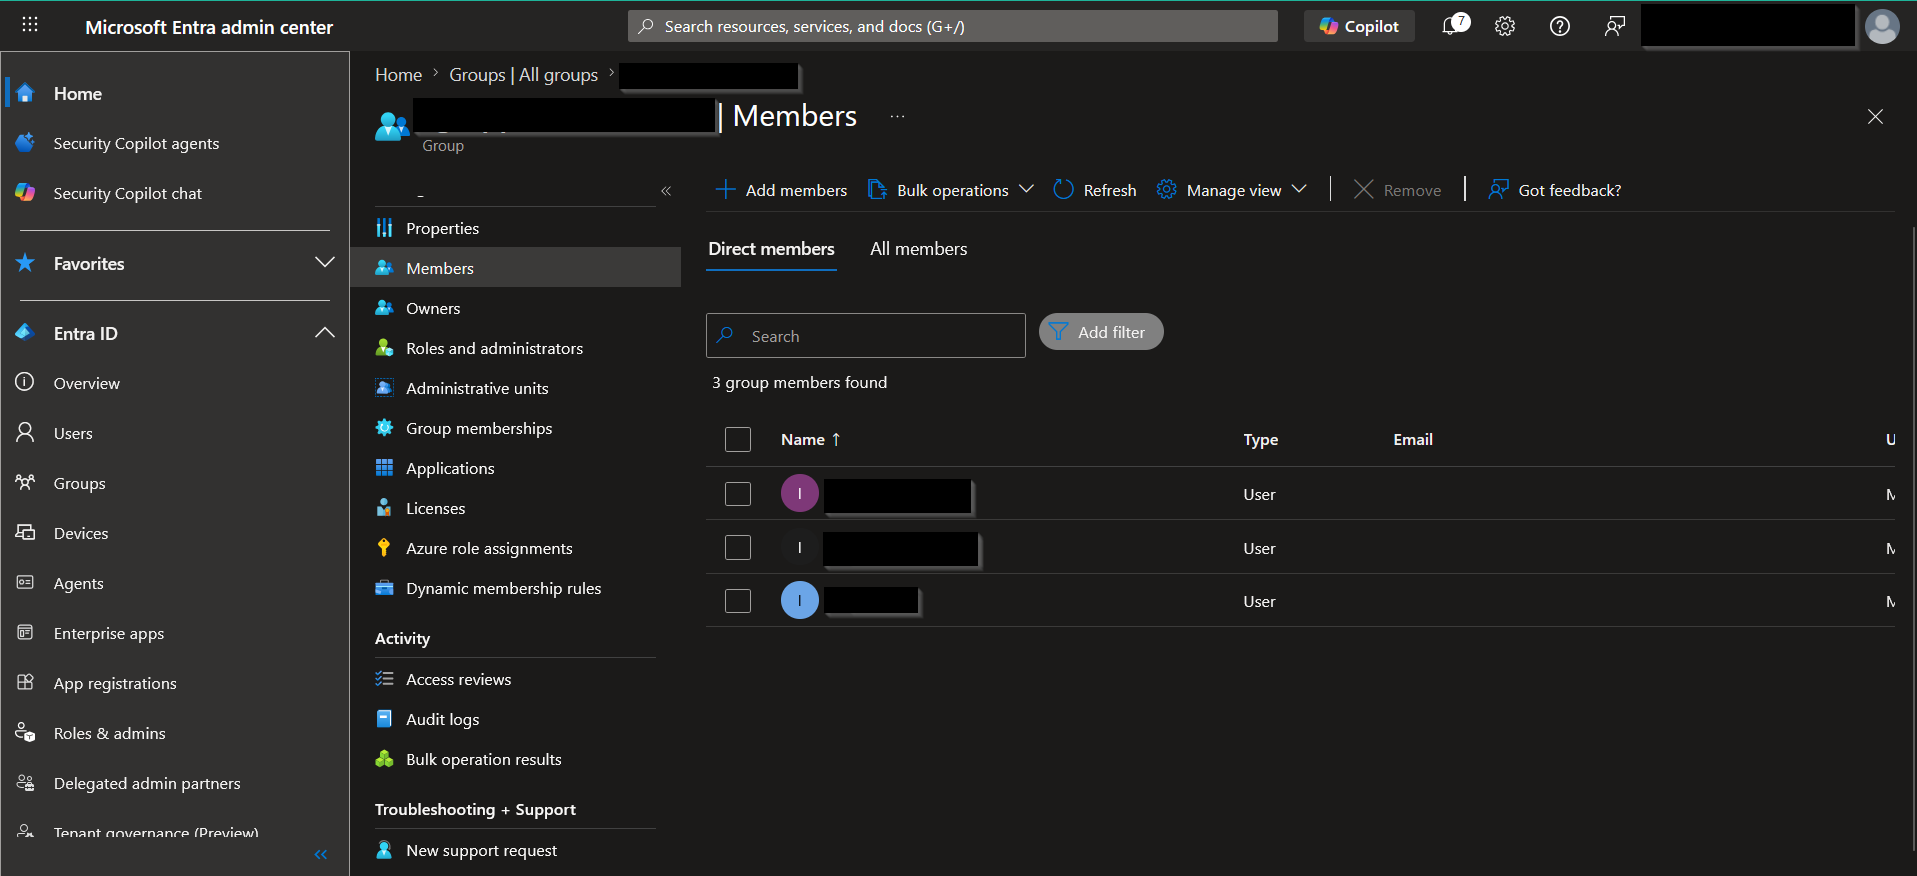
Static Groups:
- HR‑App‑Users‑Group → add HR‑User‑01
- IT‑Tools‑Users‑Group → add IT‑User‑01
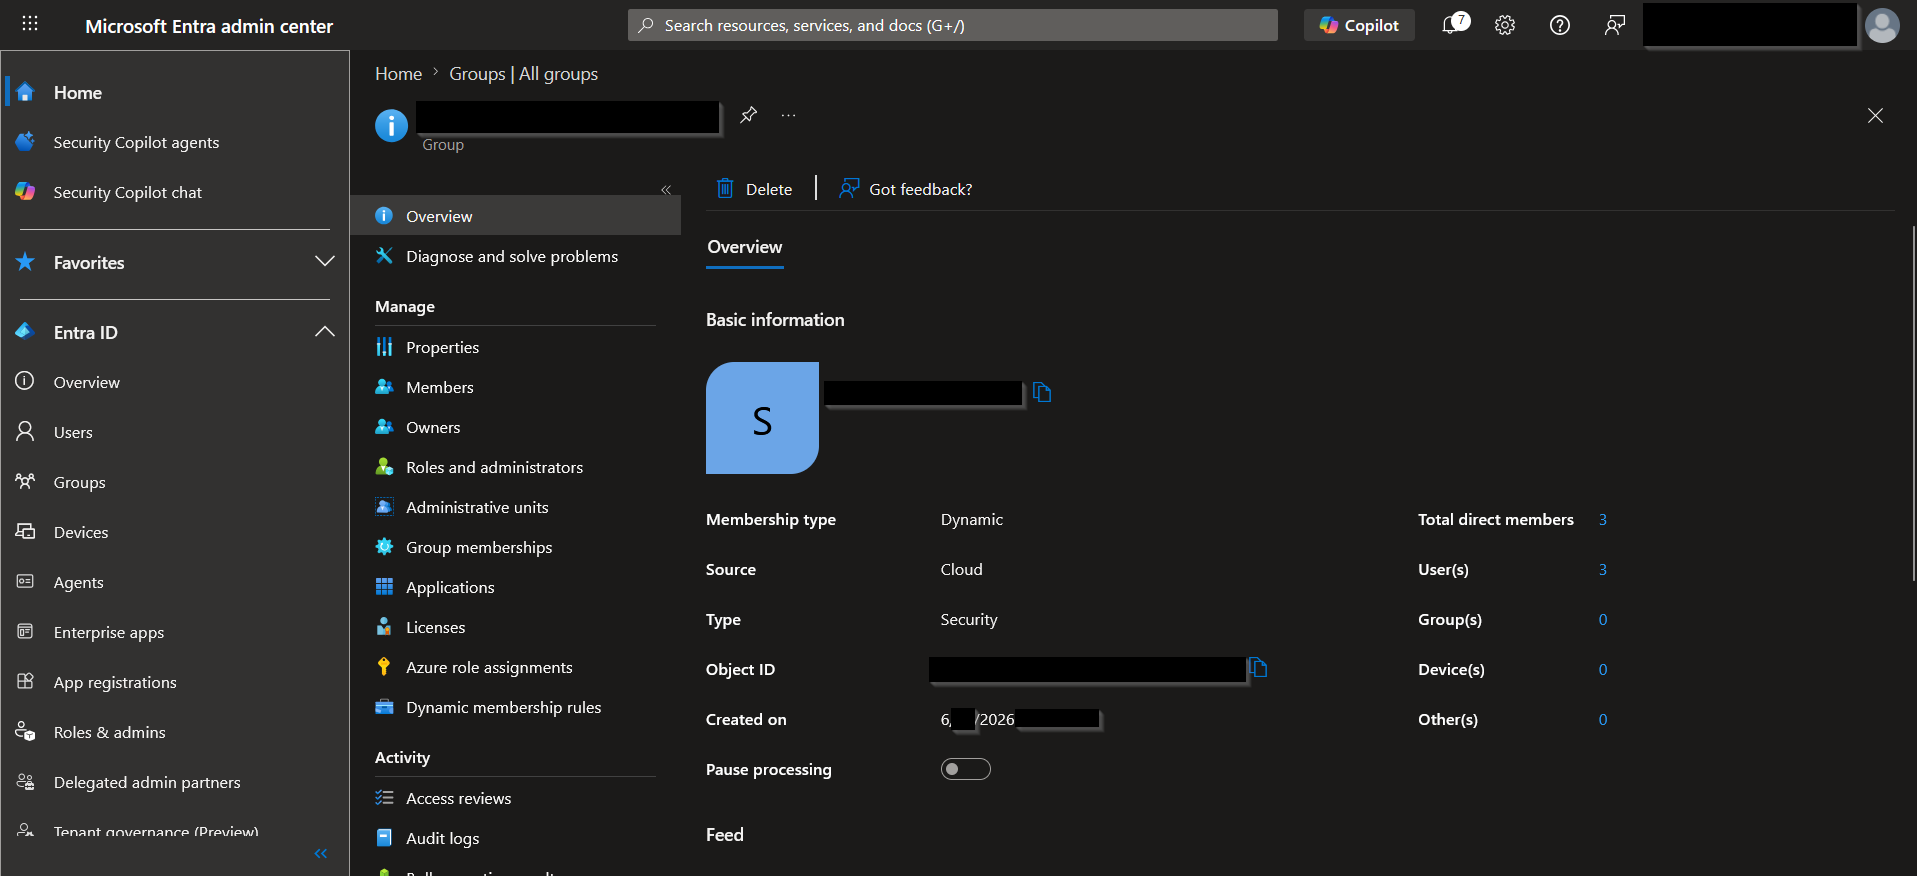
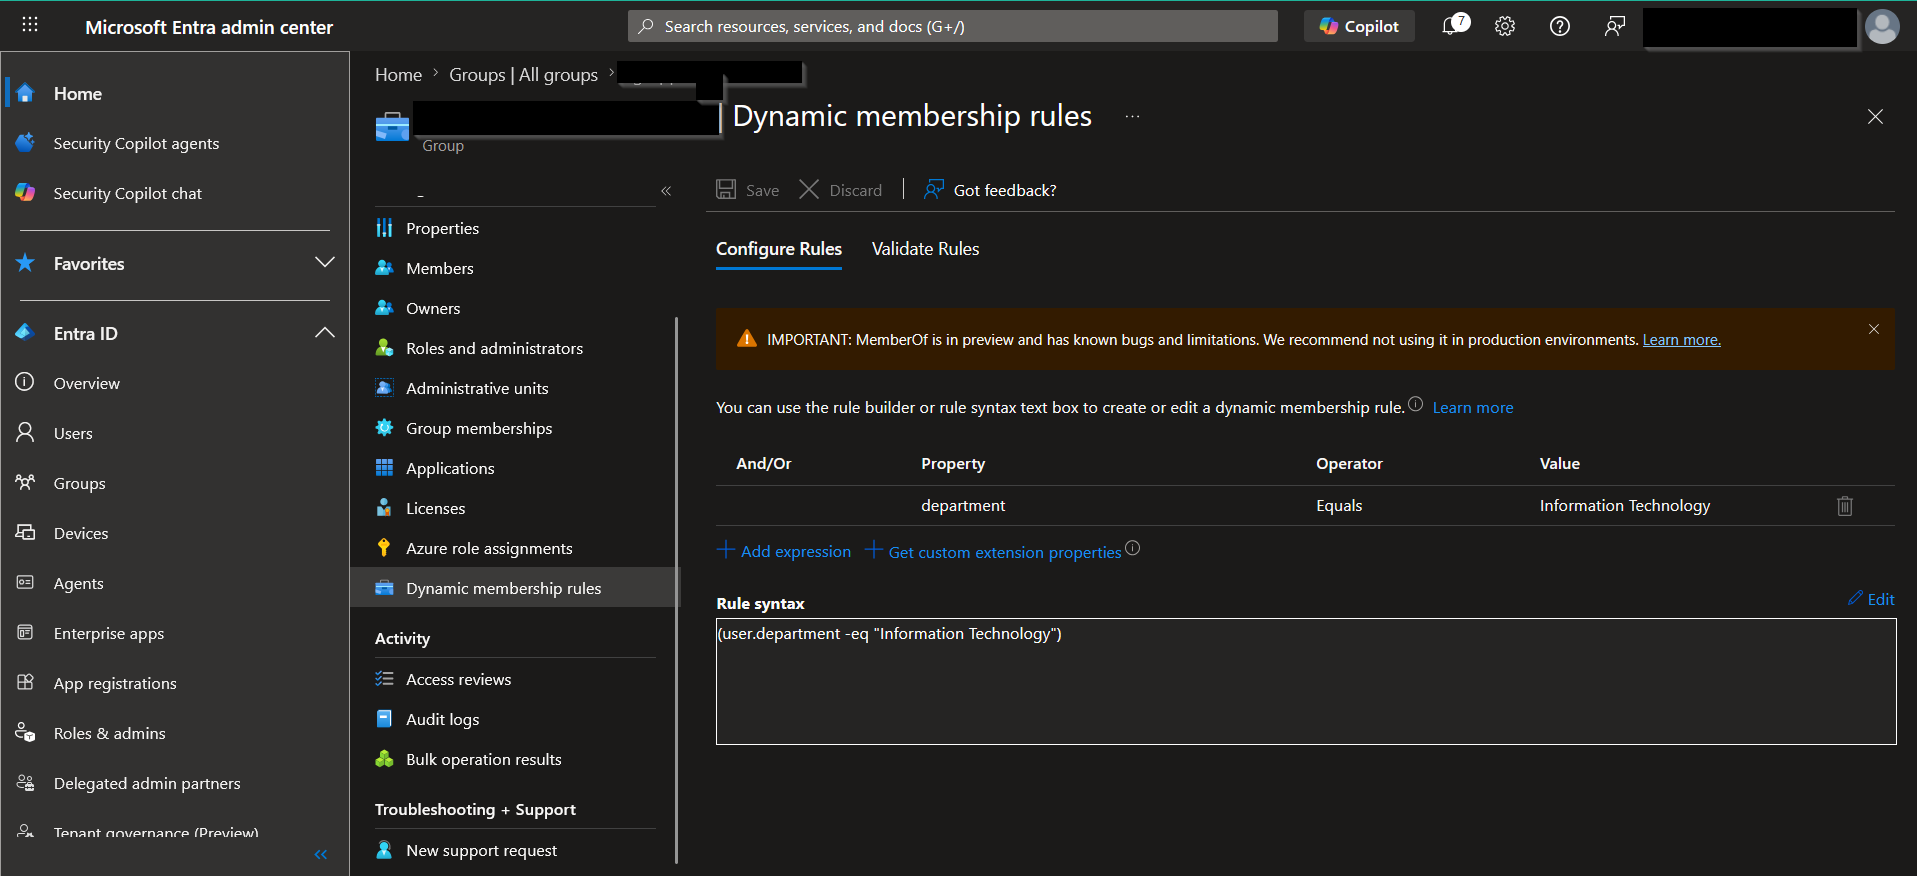
Dynamic Group:
- Name: HR‑Department‑Dynamic‑Group
- Membership type: Dynamic user
- Rule:
(user.department -eq "Human Resources")4. Configure Administrative Units
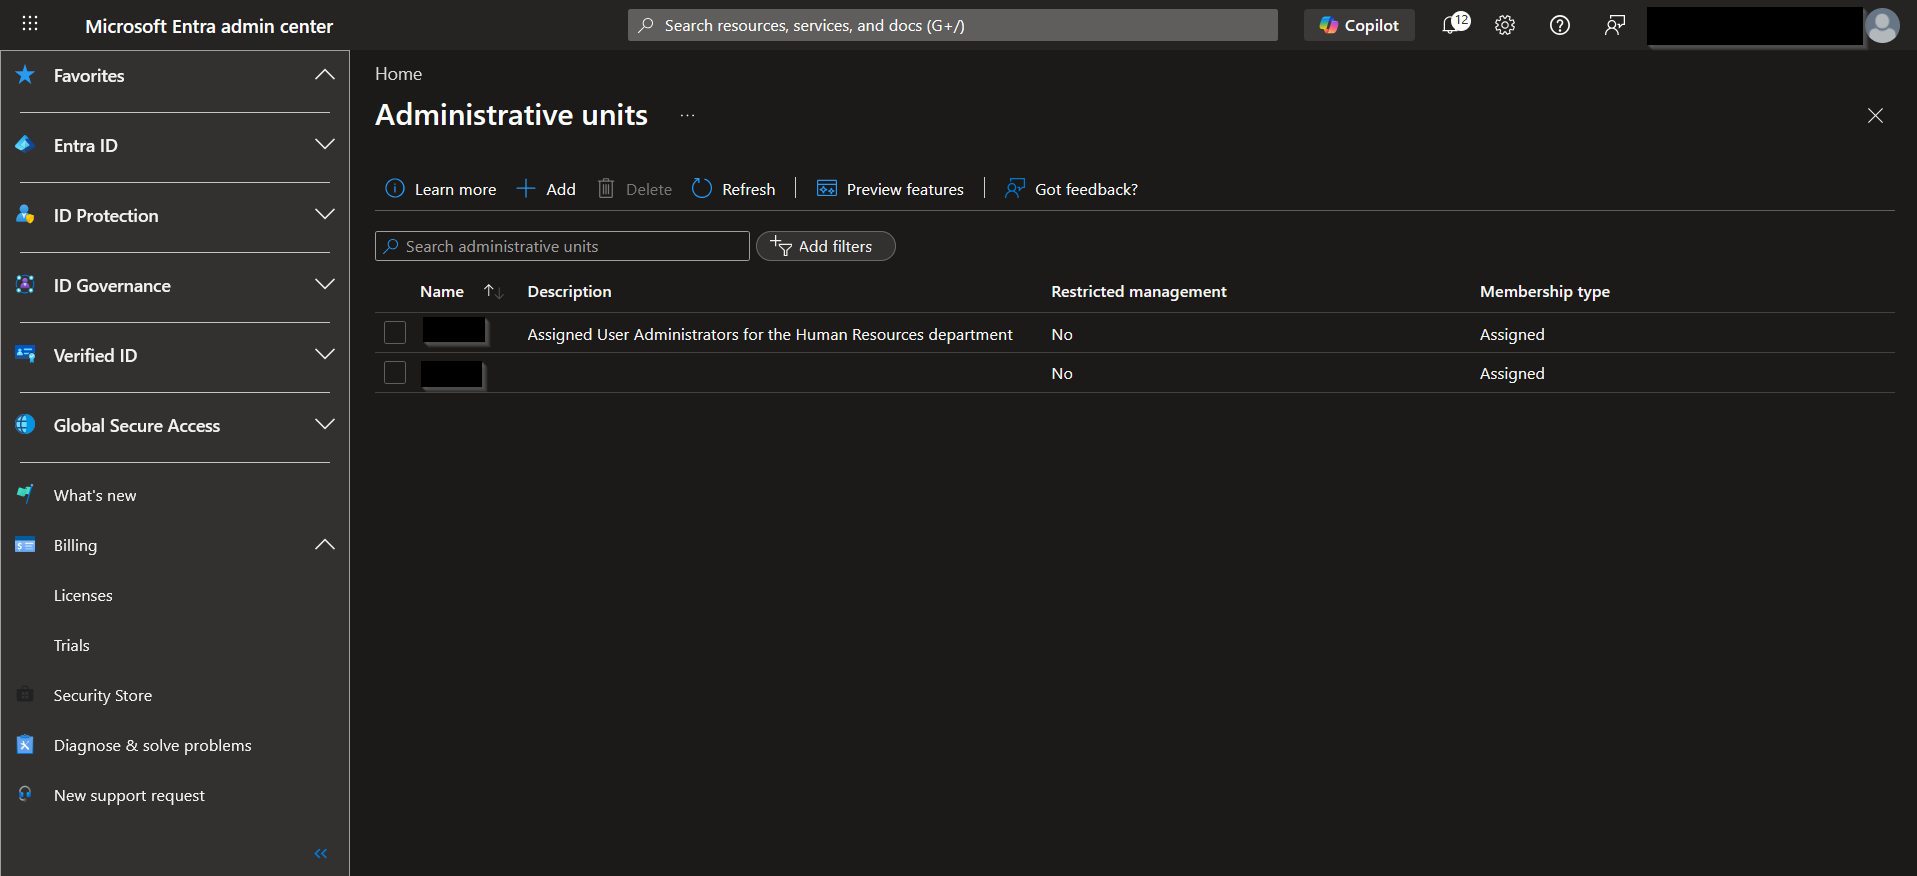
Scope administration using Administrative Units for HR and IT.
- Navigate to Entra ID → Administrative units → Add.
- Create AUs:
- HR‑Administrative‑Unit
- IT‑Administrative‑Unit
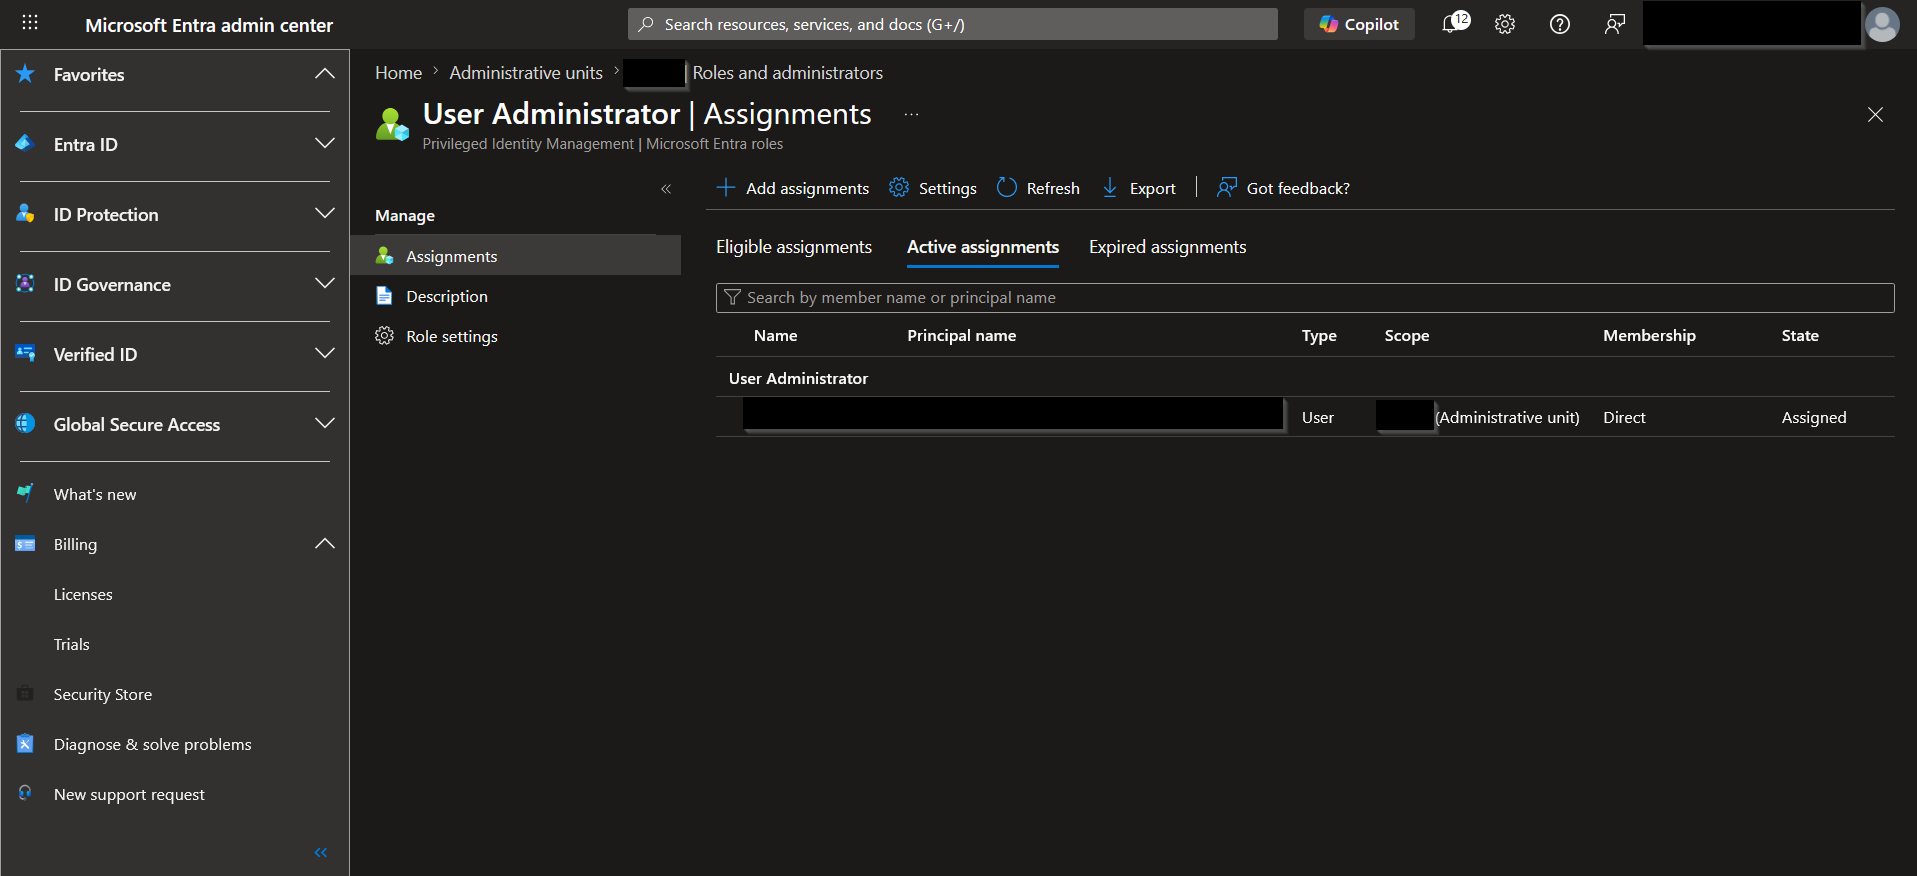
- Assign Security‑Admin‑Account as User Administrator scoped to the appropriate AU.
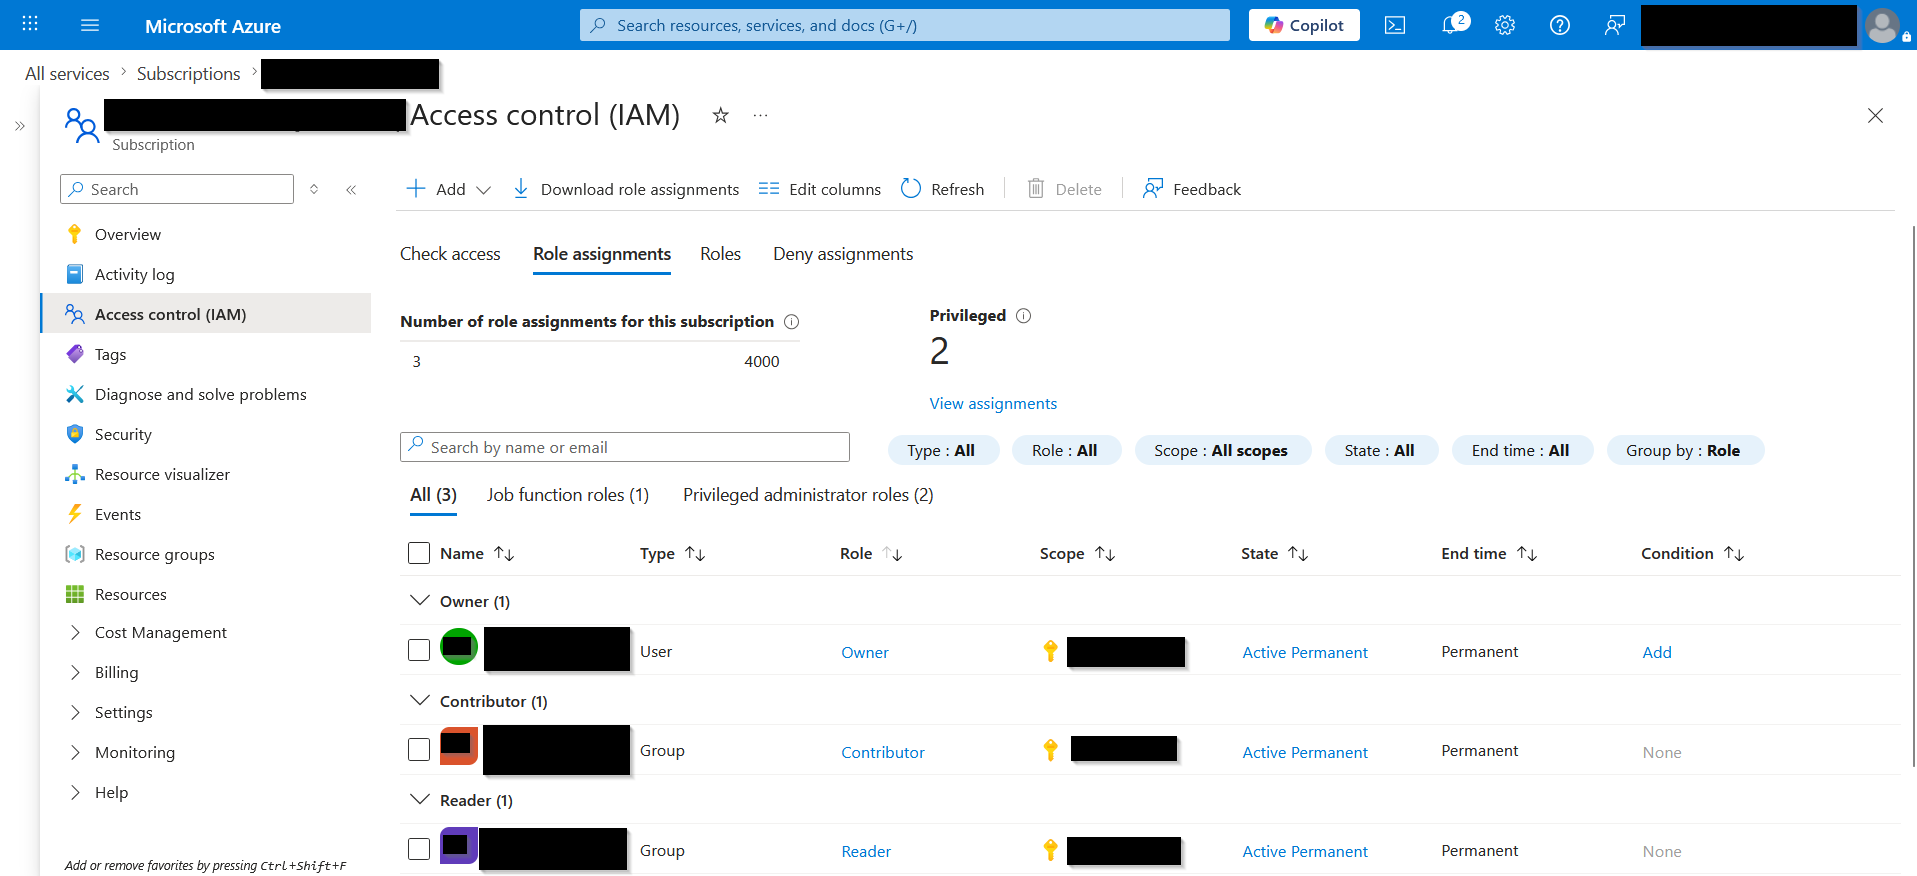
5. Assign Built‑in RBAC Roles via Groups
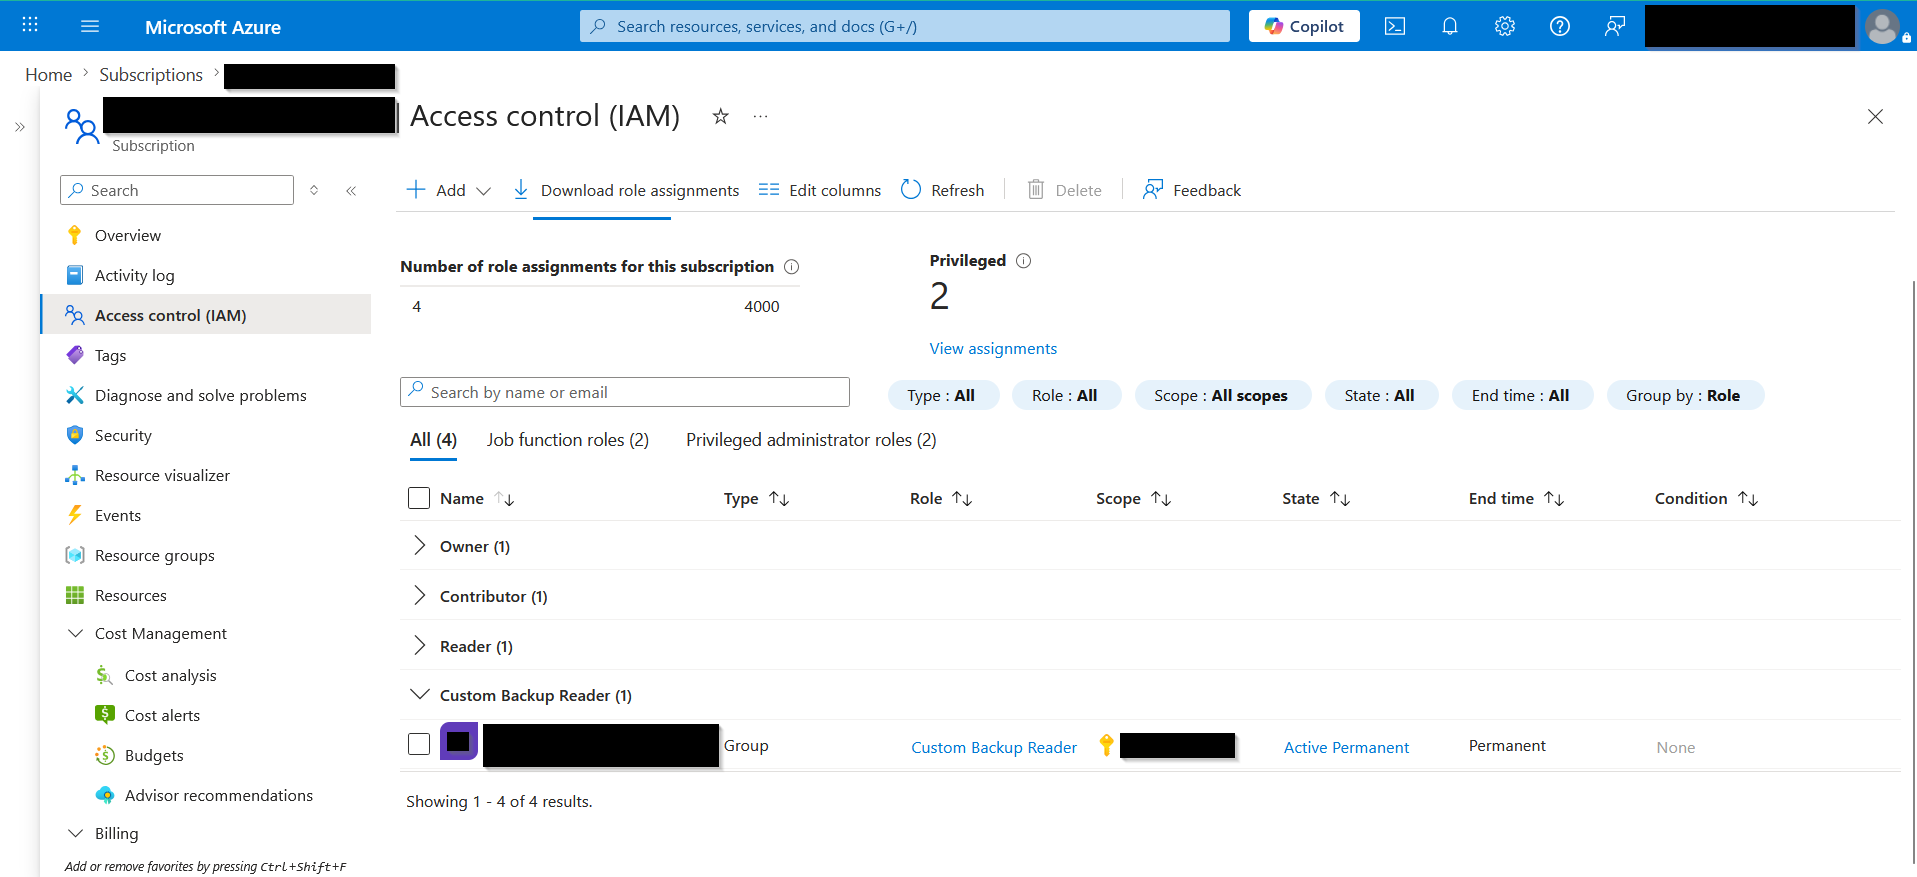
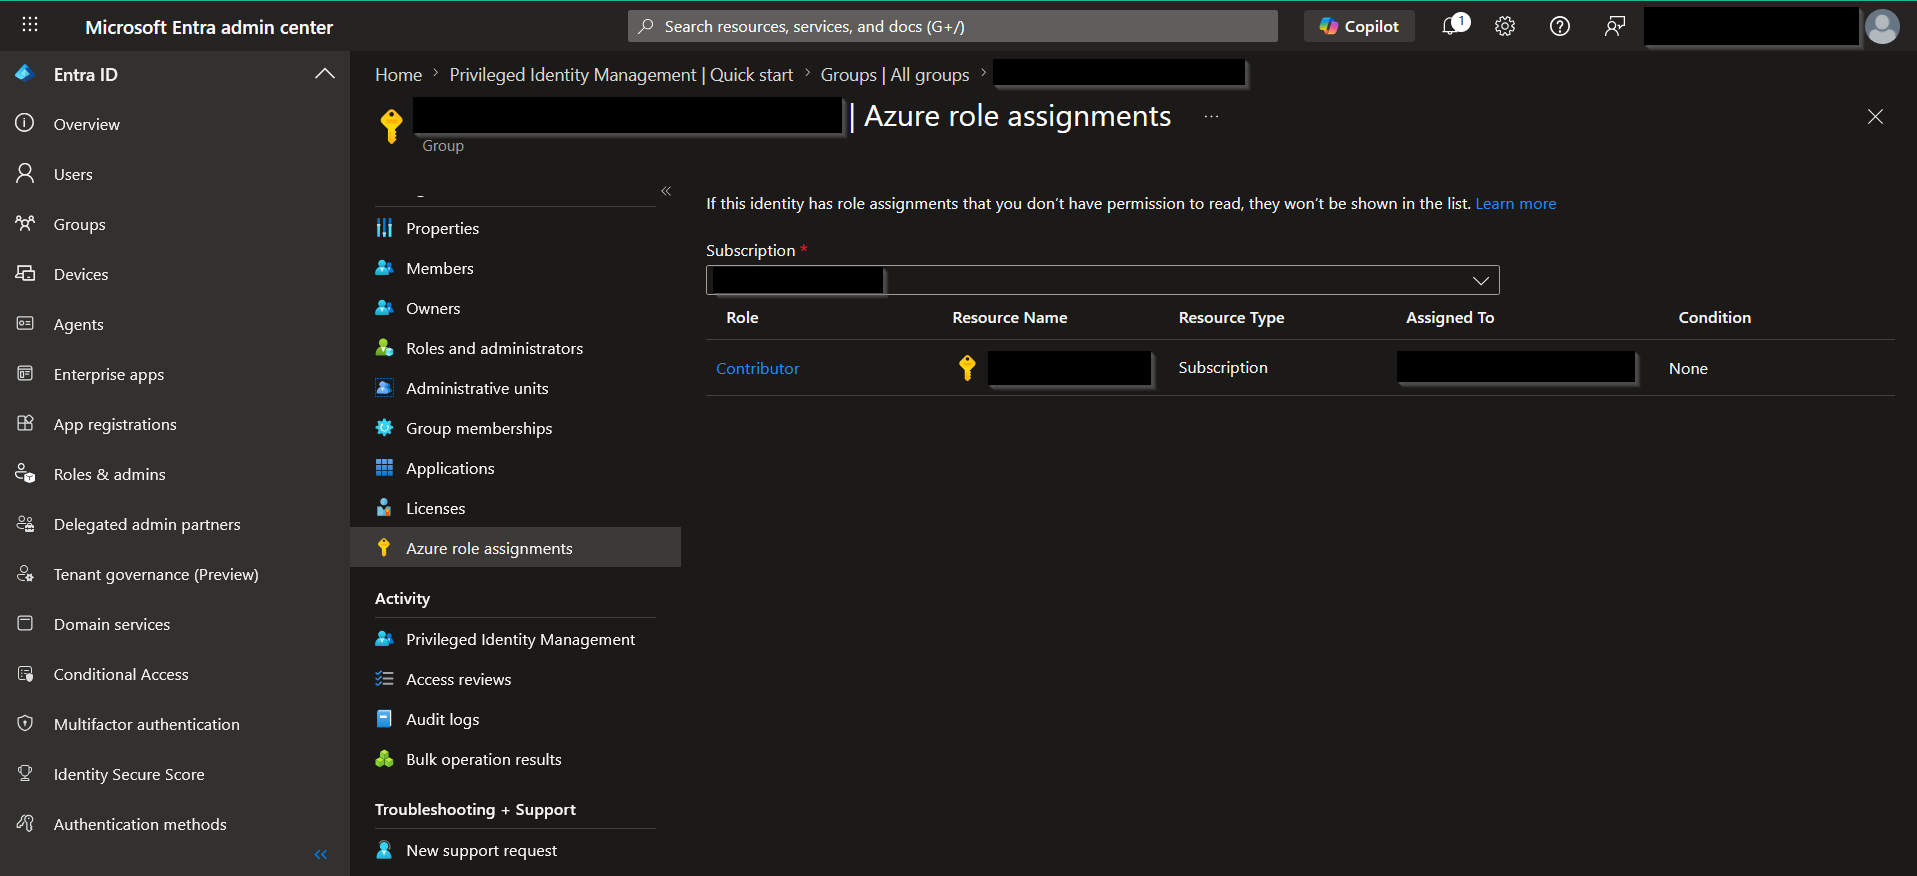
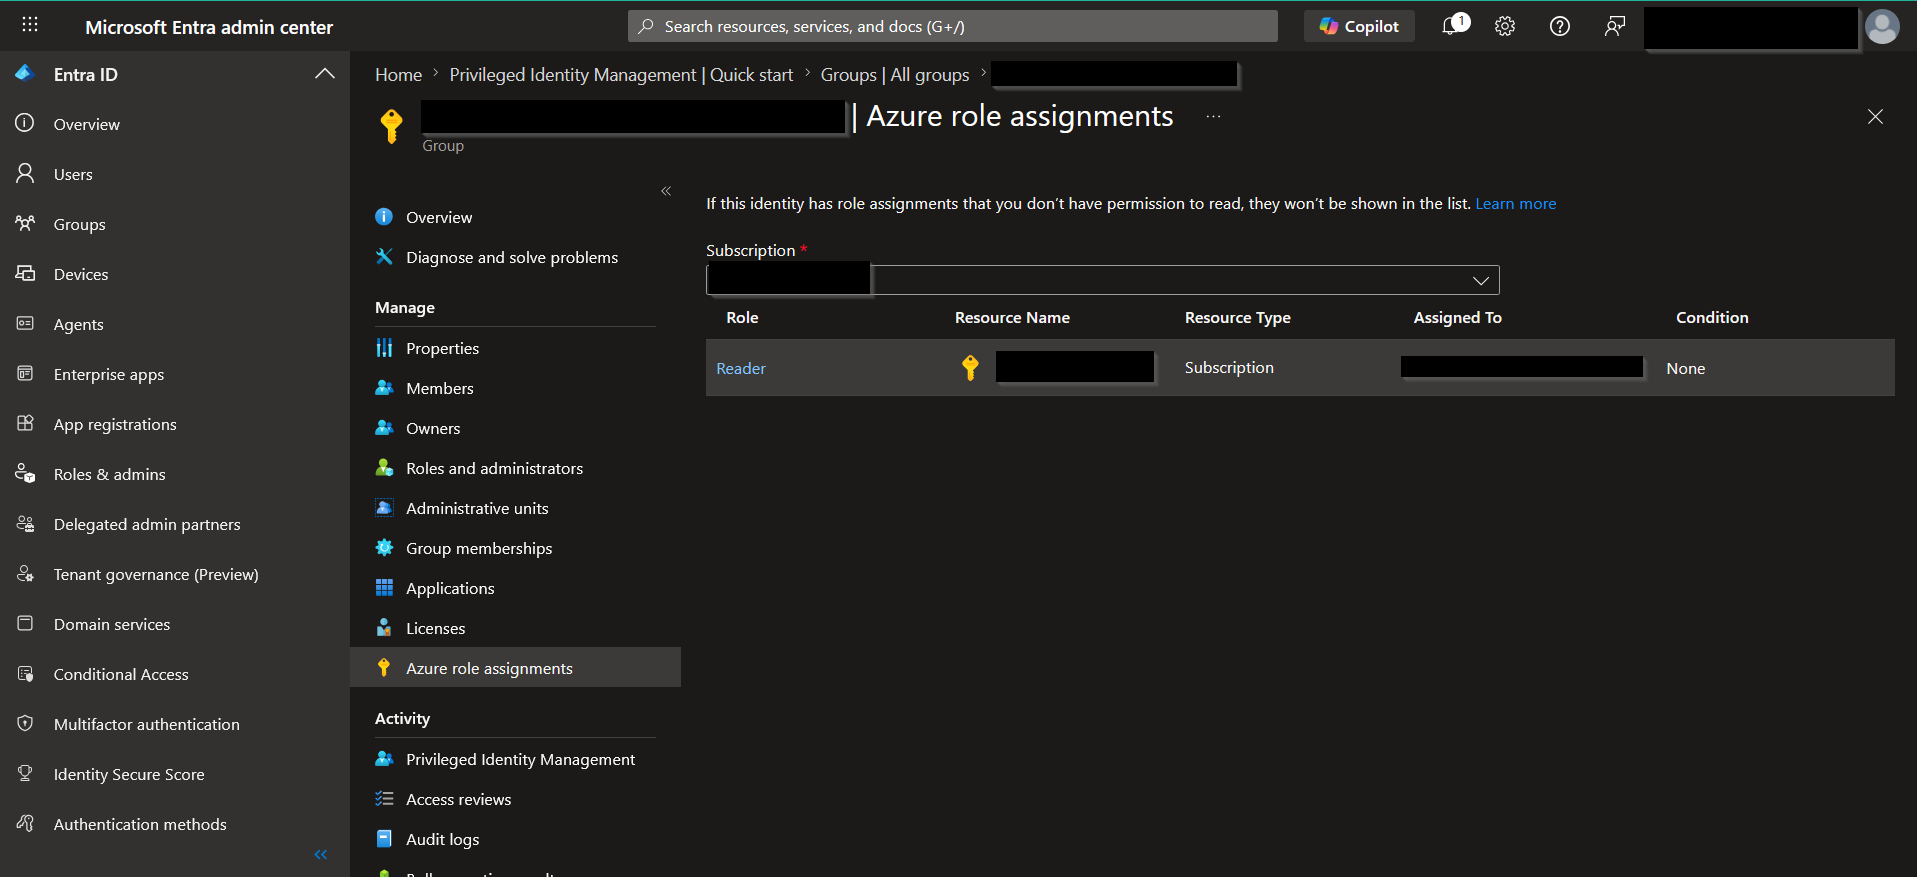
Use group‑based RBAC to assign Reader and Contributor roles at the subscription level.
- Go to Subscription → Access control (IAM).
- Assign roles:
- Reader → Read‑Only‑Admin‑Group
- Contributor → Subscription‑Owners‑Group
- Verify assignments in:
- IAM → Role assignments filtered by Group
- Group → Azure role assignments tab
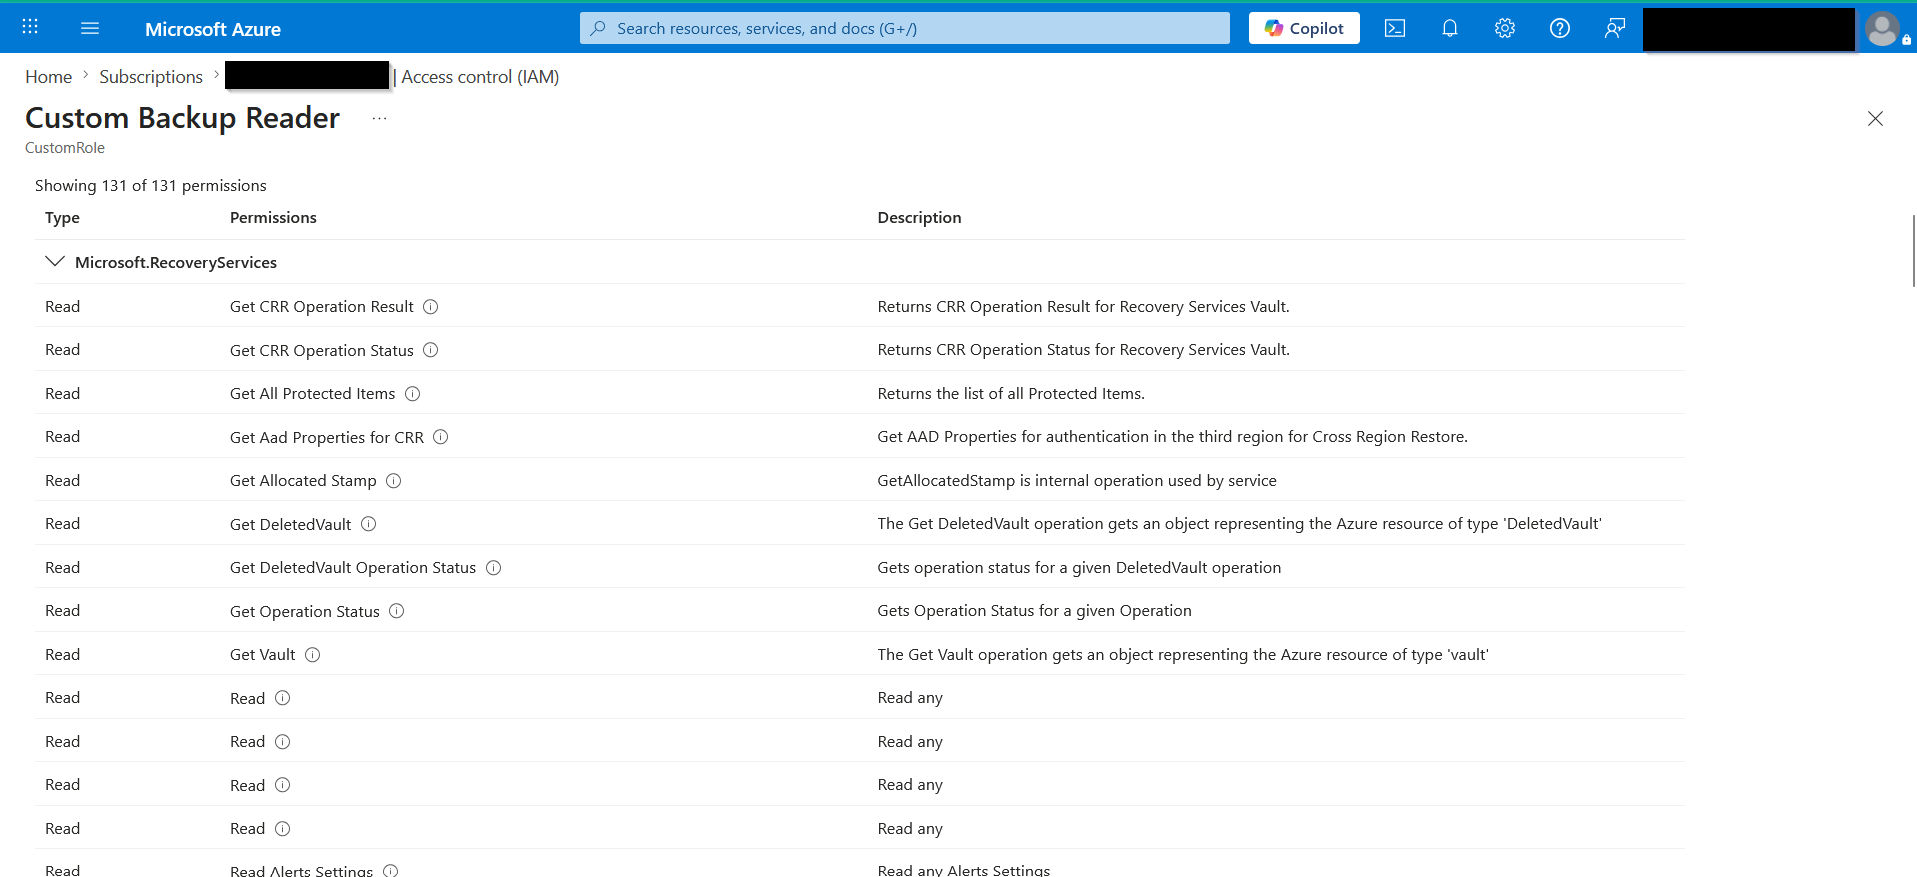
6. Create and assign custom Backup Reader role
Design a custom role that grants read‑only access to Recovery Services Vaults.
- In IAM, select Add → Add custom role.
- Name the role Custom Backup Reader.
- Add permission:
Microsoft.RecoveryServices/*/read
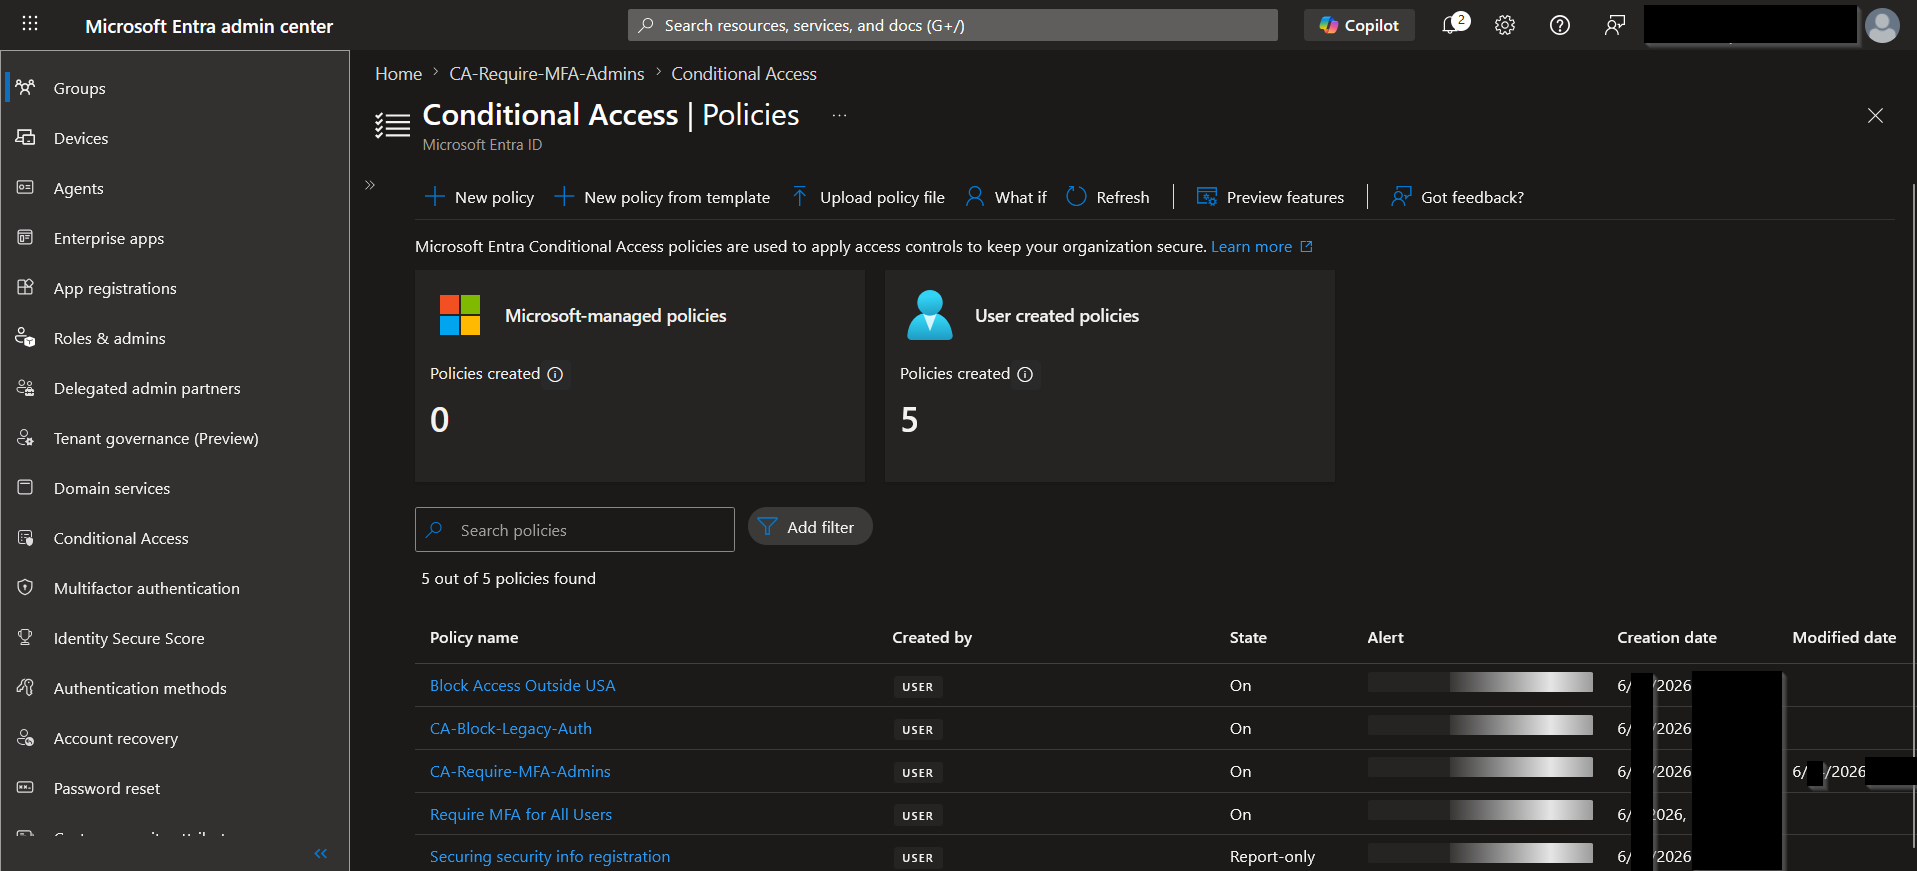
7. Configure Conditional Access Policies
Enforce MFA for admin roles and block legacy authentication clients.
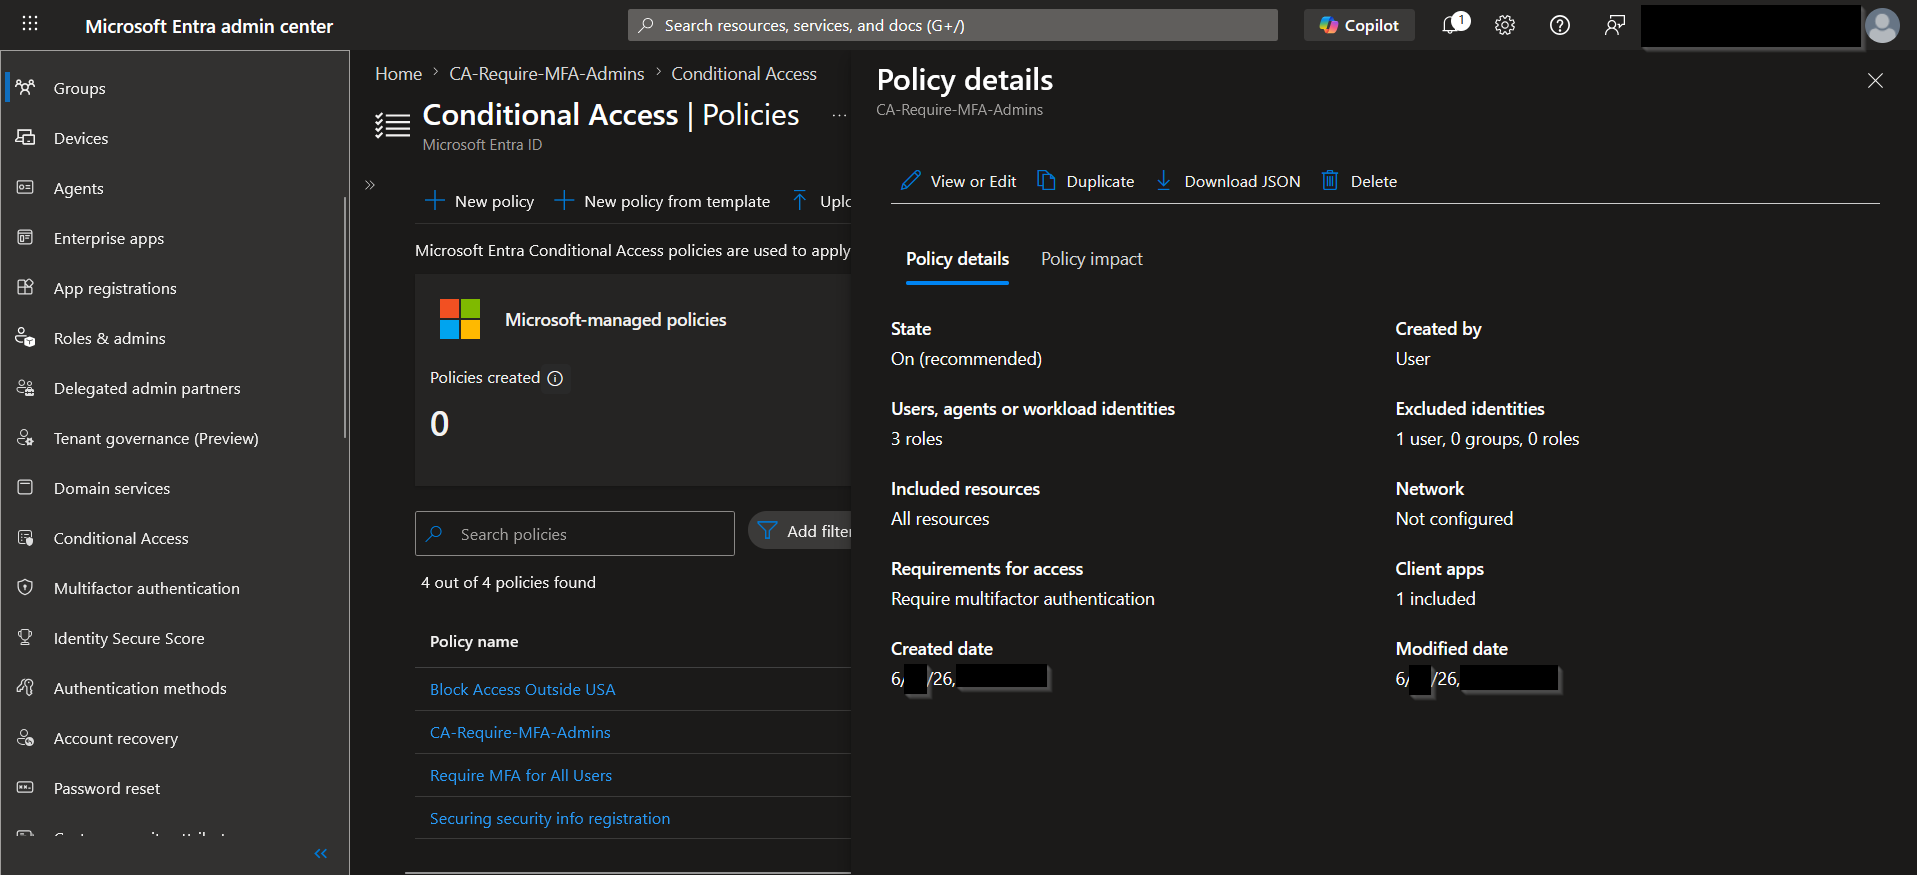
Policy 1 — CA‑Require‑MFA‑Admins
- Navigate to Entra ID → Protection → Conditional Access → New policy.
- Users: Directory roles (Global Administrator, Privileged Role Administrator, Security Administrator).
- Cloud apps: All.
- Grant: Require MFA.
- Enable: On.
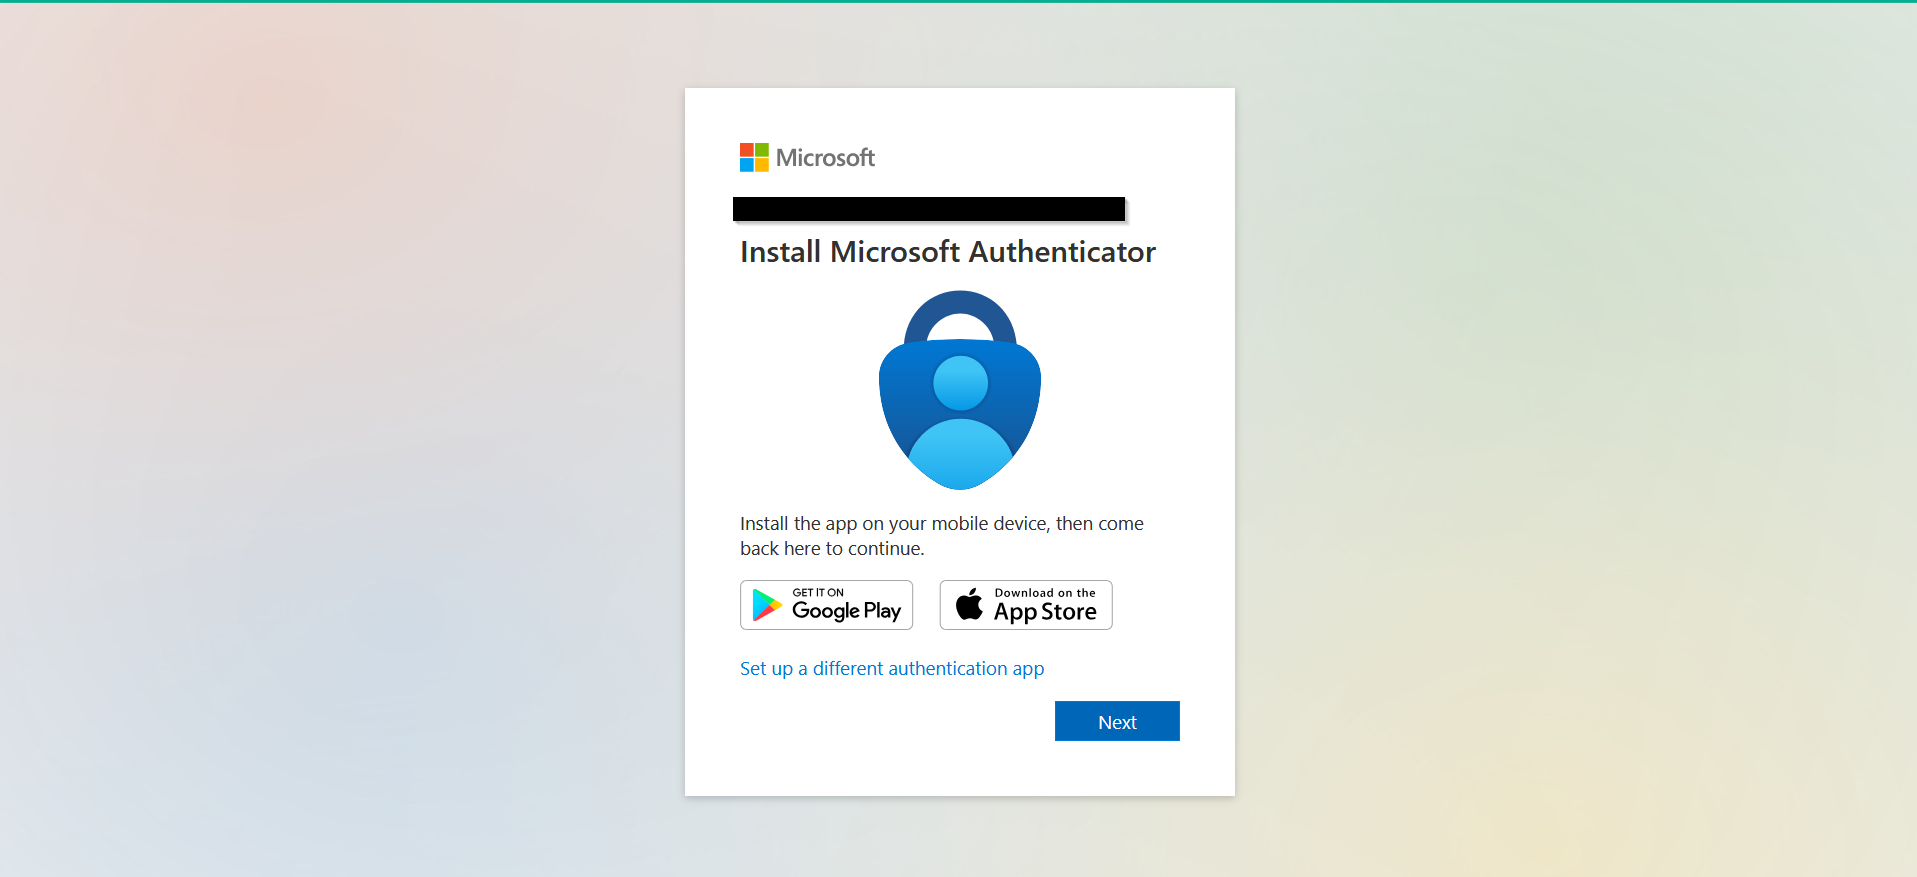
- Test by signing in as Admin‑Account‑01 and confirming MFA prompt.
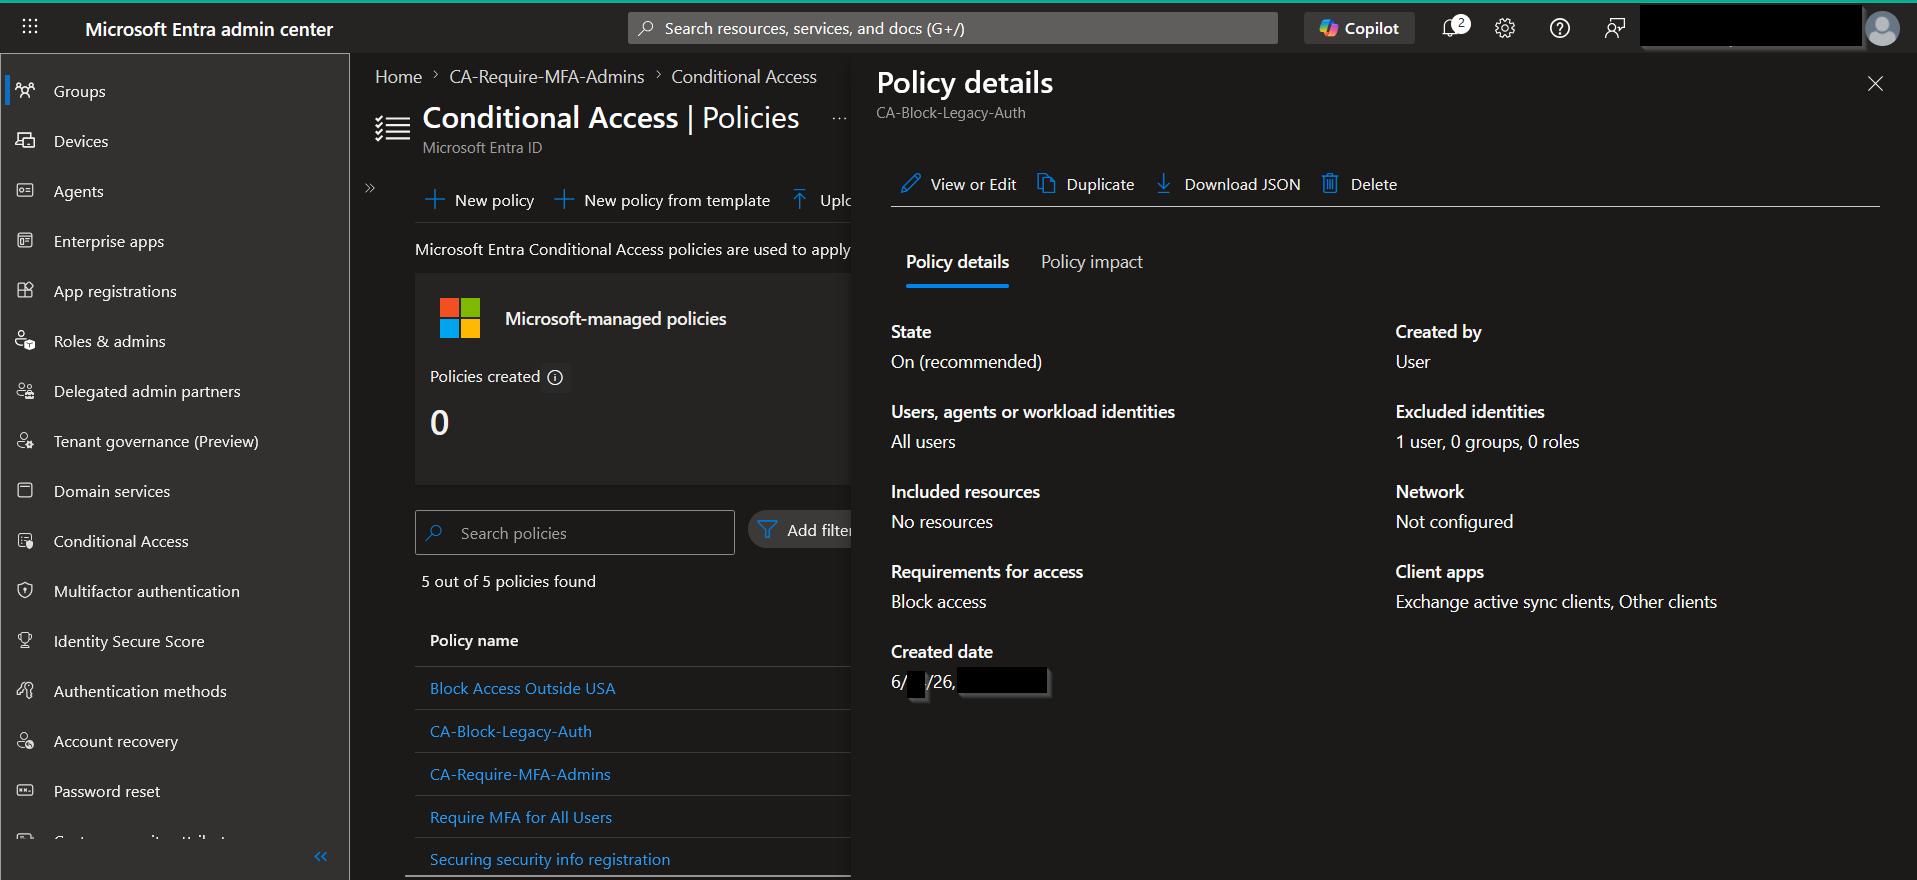
Policy 2 — CA‑Block‑Legacy‑Auth
- Users: All (except break‑glass accounts).
- Client apps: Legacy authentication clients.
- Grant: Block access.
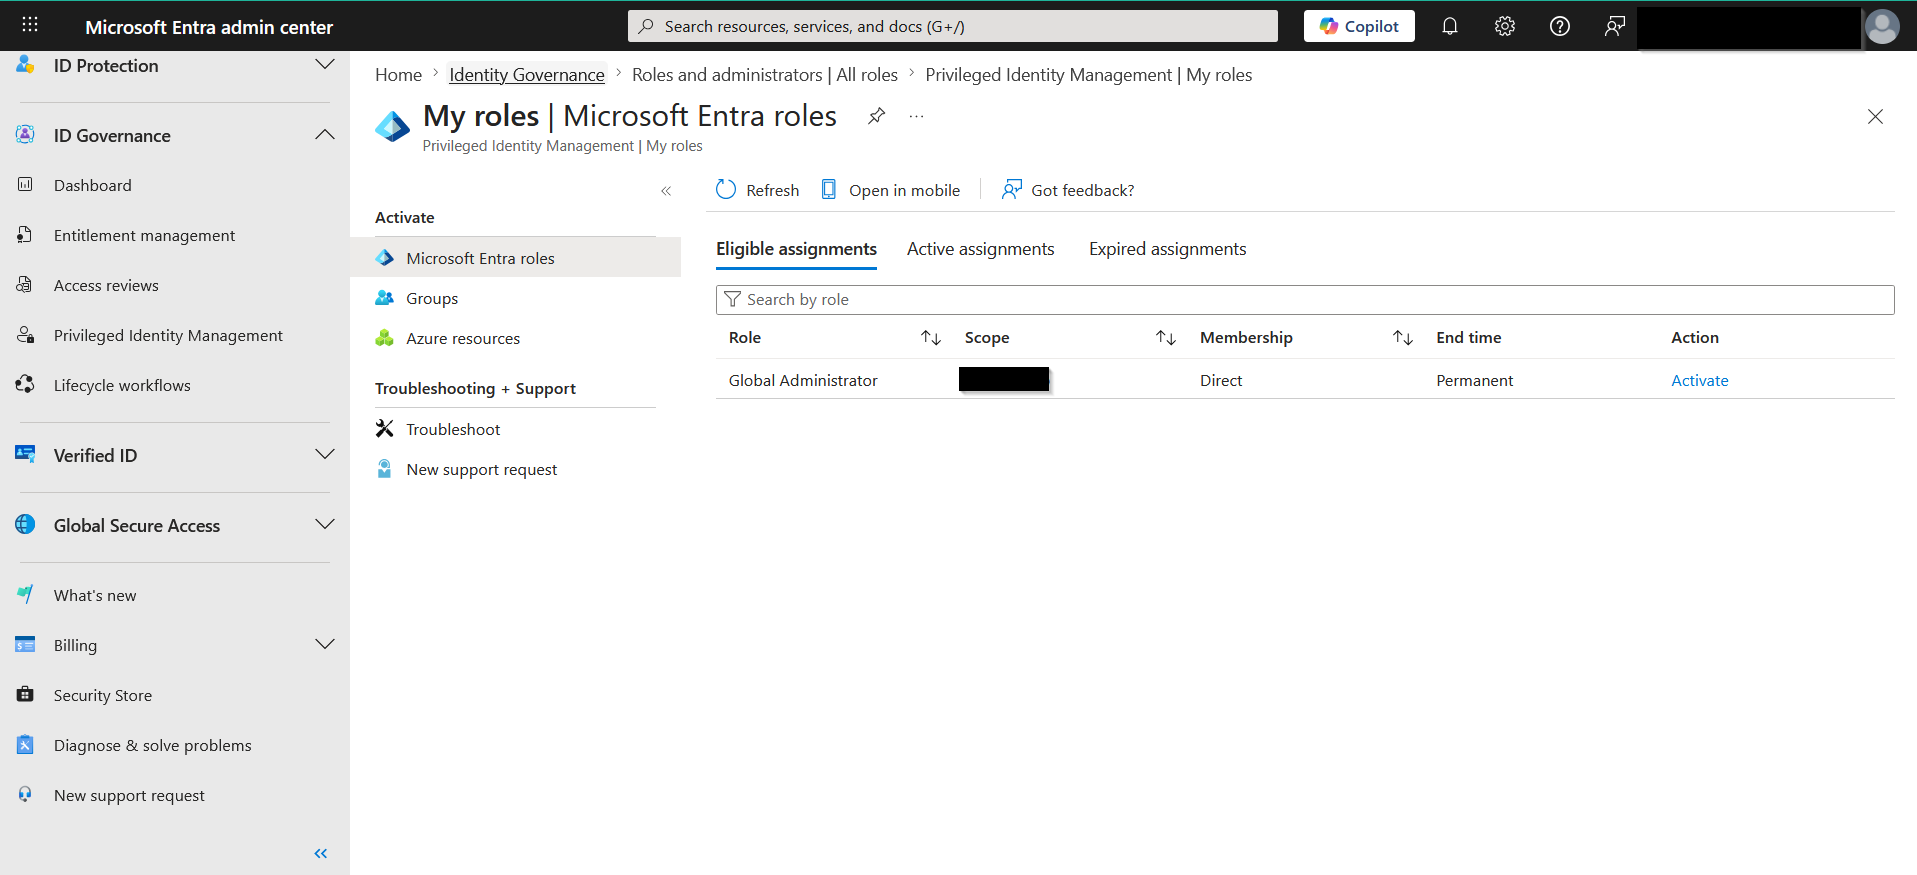
8. Configure Privileged Identity Management (PIM)
Implement just‑in‑time access for Global Administrator using PIM eligibility and activation.
- Go to Entra ID → Roles & administrators → PIM.
- For Global Administrator:
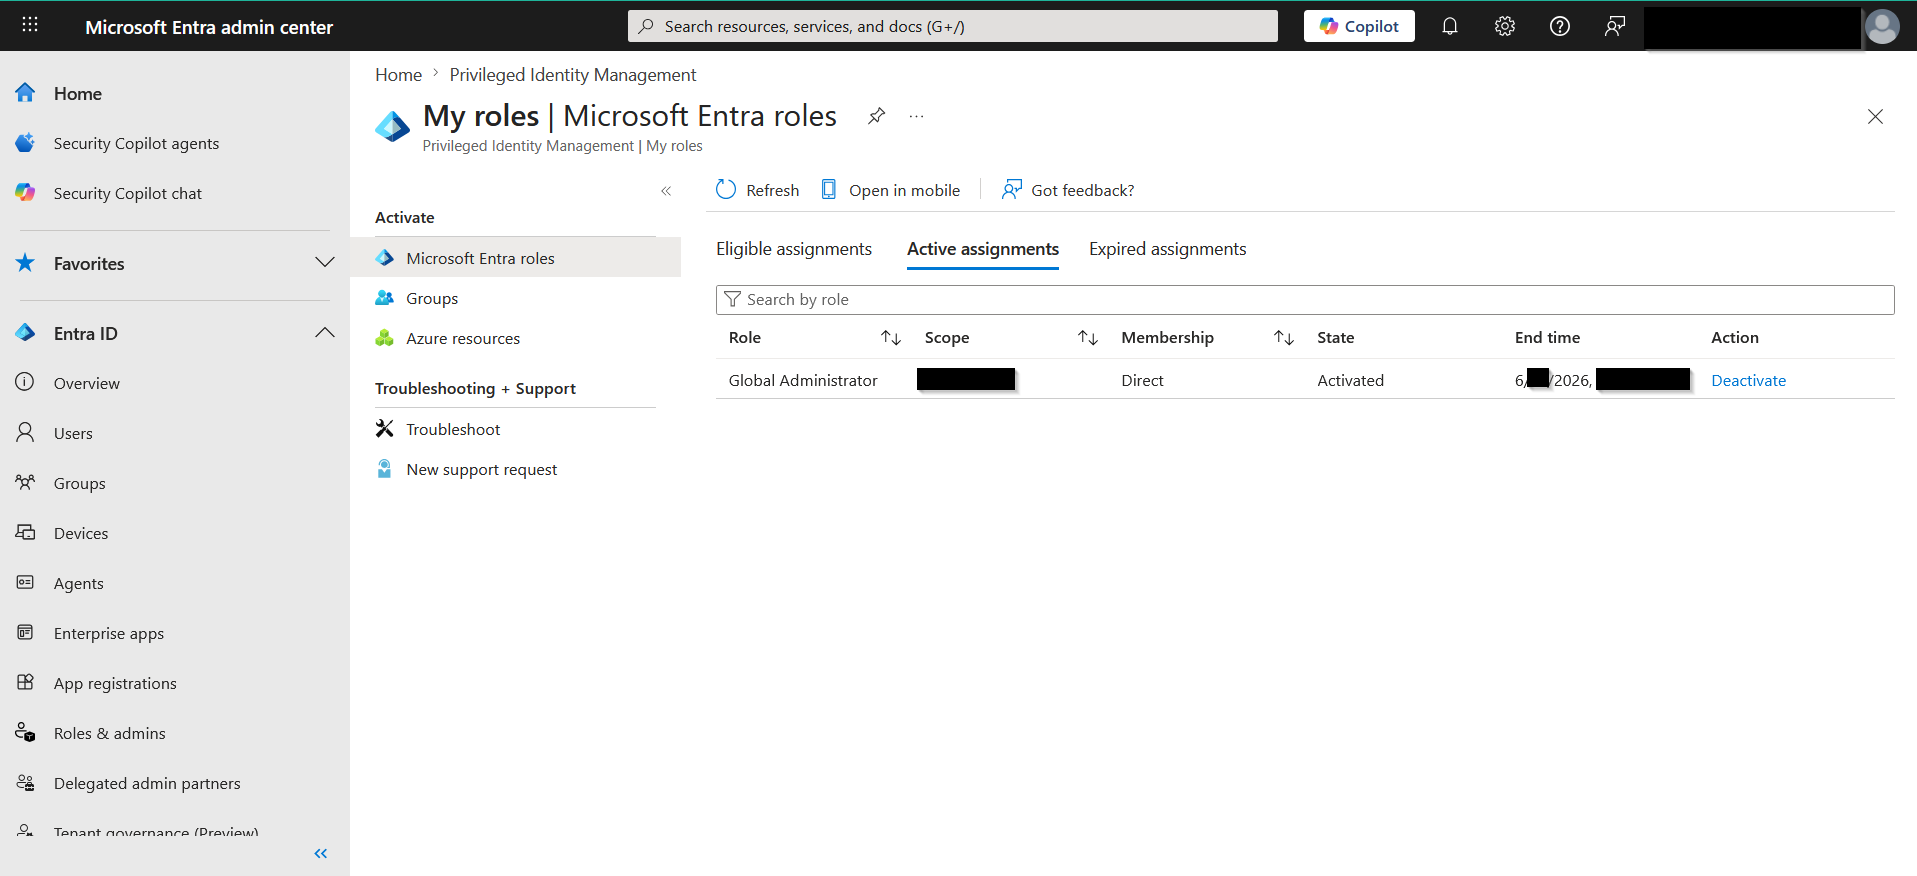
- Add Admin‑Account‑01 as Eligible.
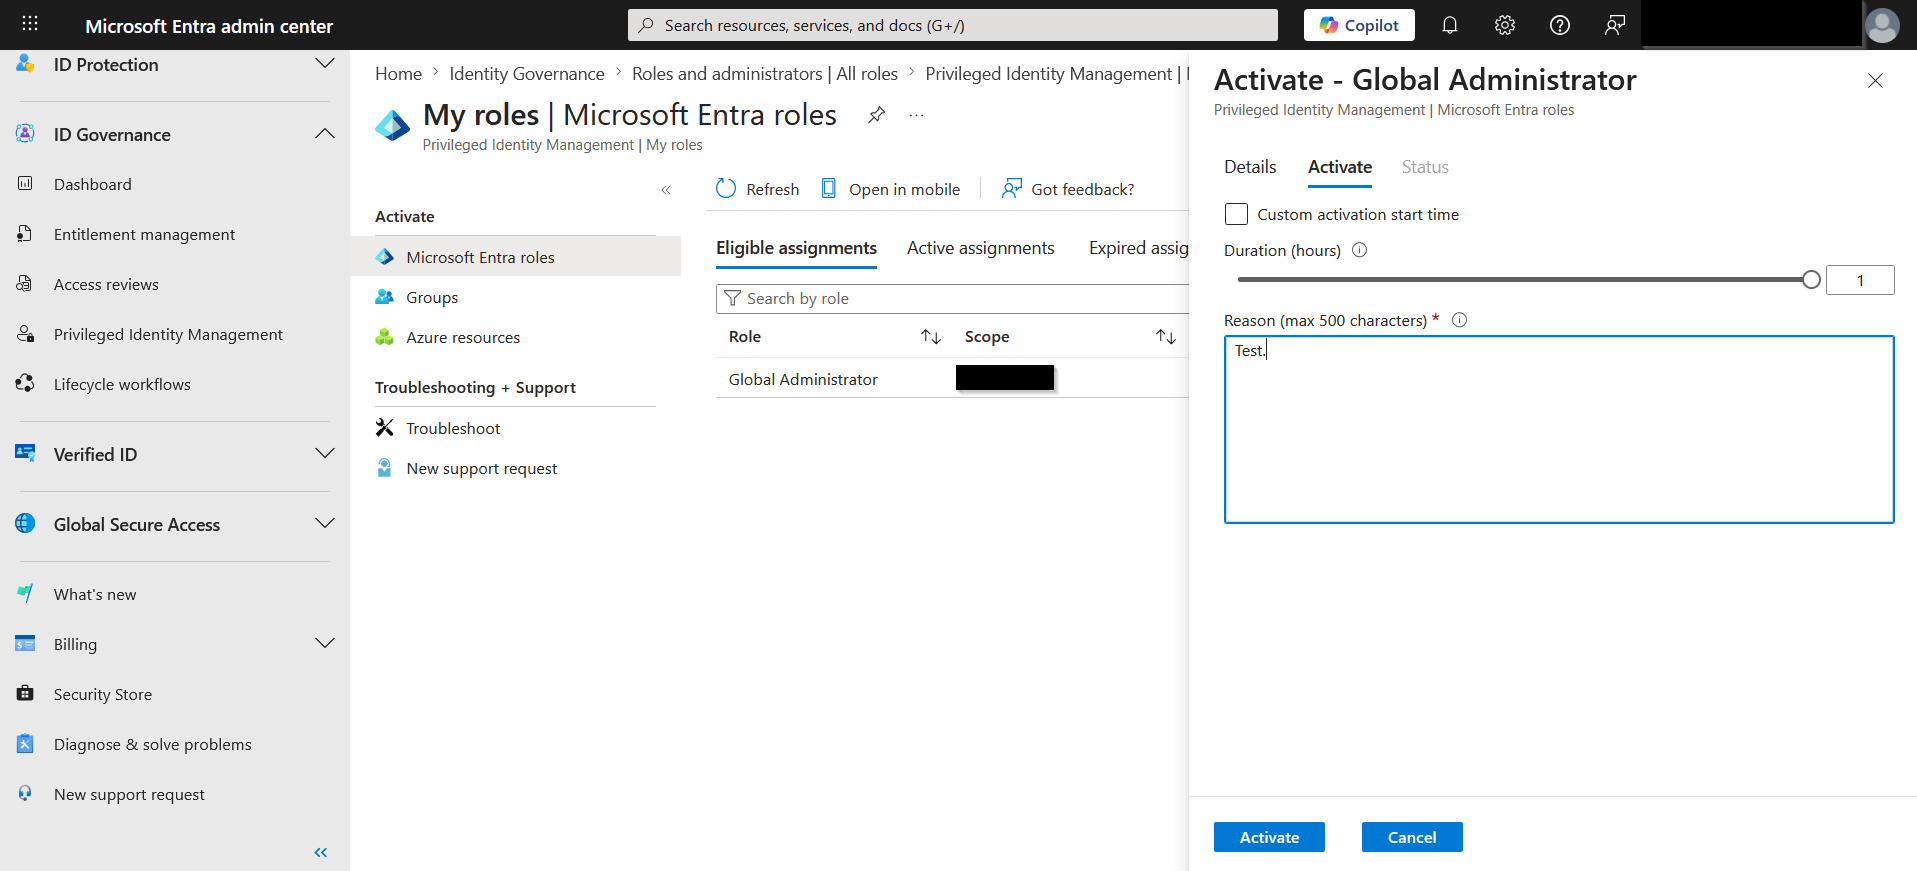
- Require MFA, justification, and a 1‑hour activation window.
- Sign in as Admin‑Account‑01 → PIM → My roles → Activate.
- Provide justification, complete MFA, and confirm activation.
9. Review Logs and Diagnostics
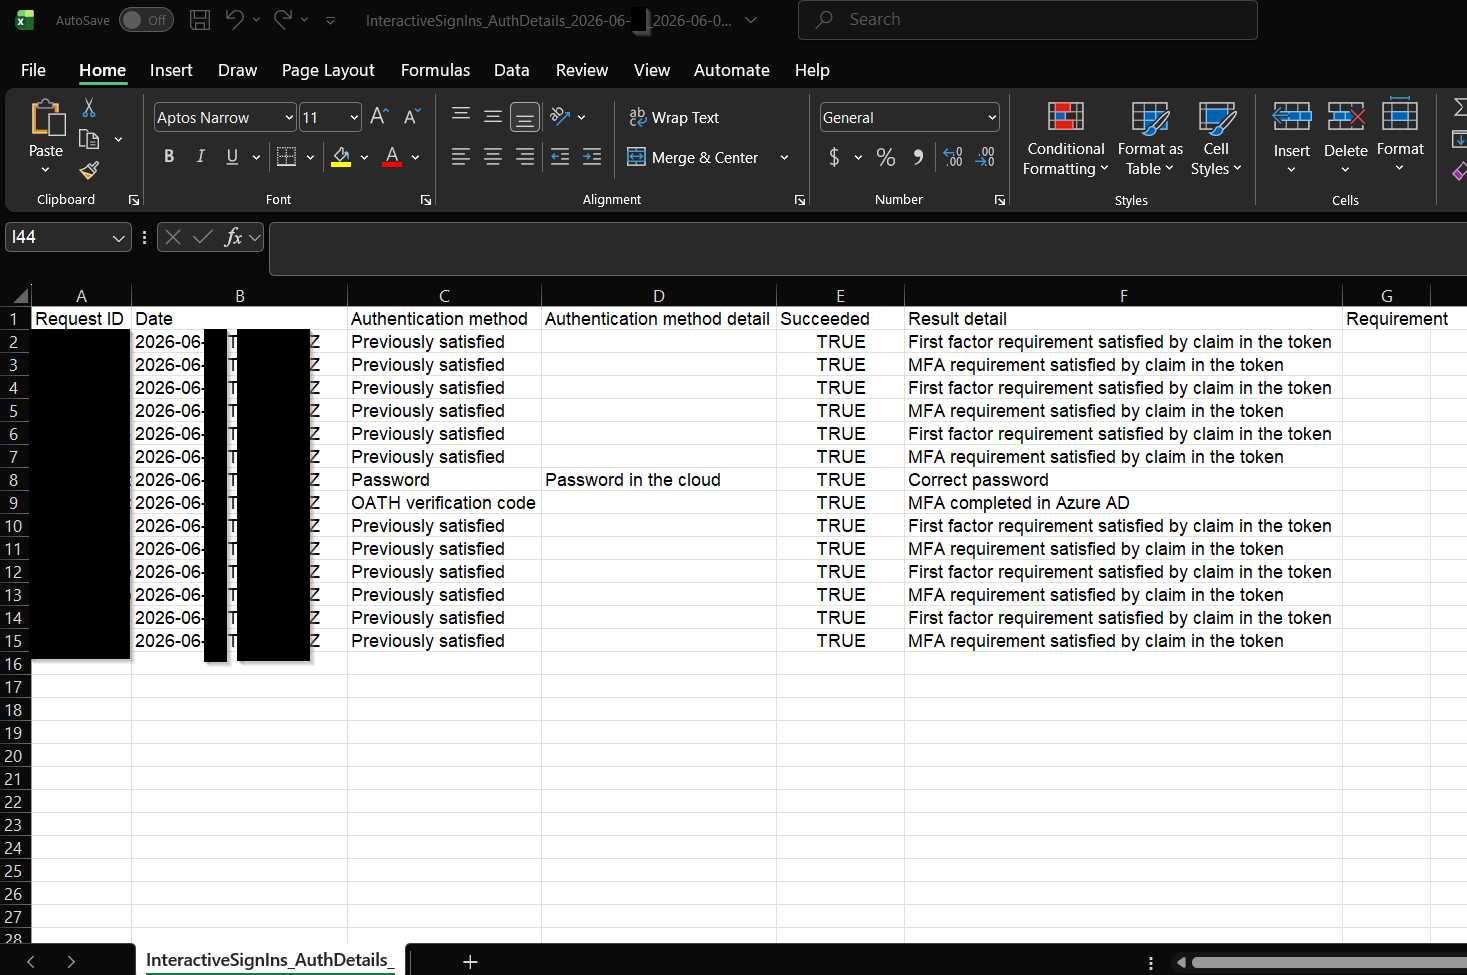
Validate Conditional Access and PIM behavior using sign‑in and audit logs.
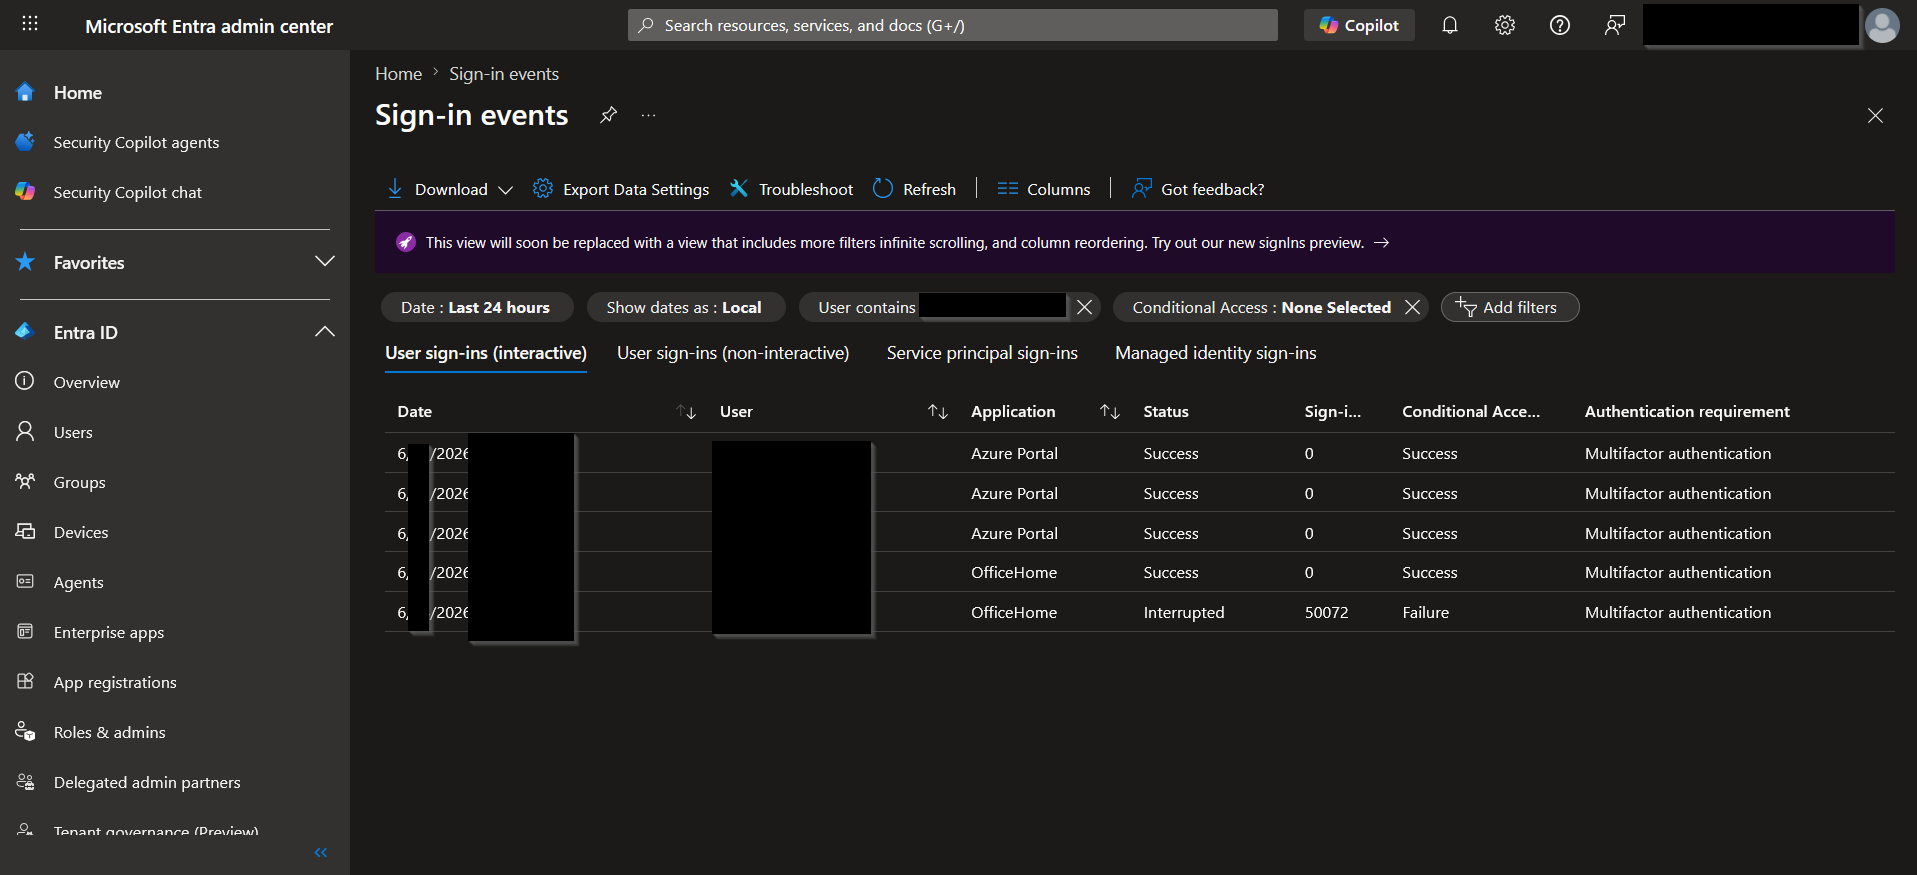
Sign-In Logs
- Filter by user: Admin‑Account‑01
- Filter by Conditional Access: Applied
- Confirm entries showing MFA requirement
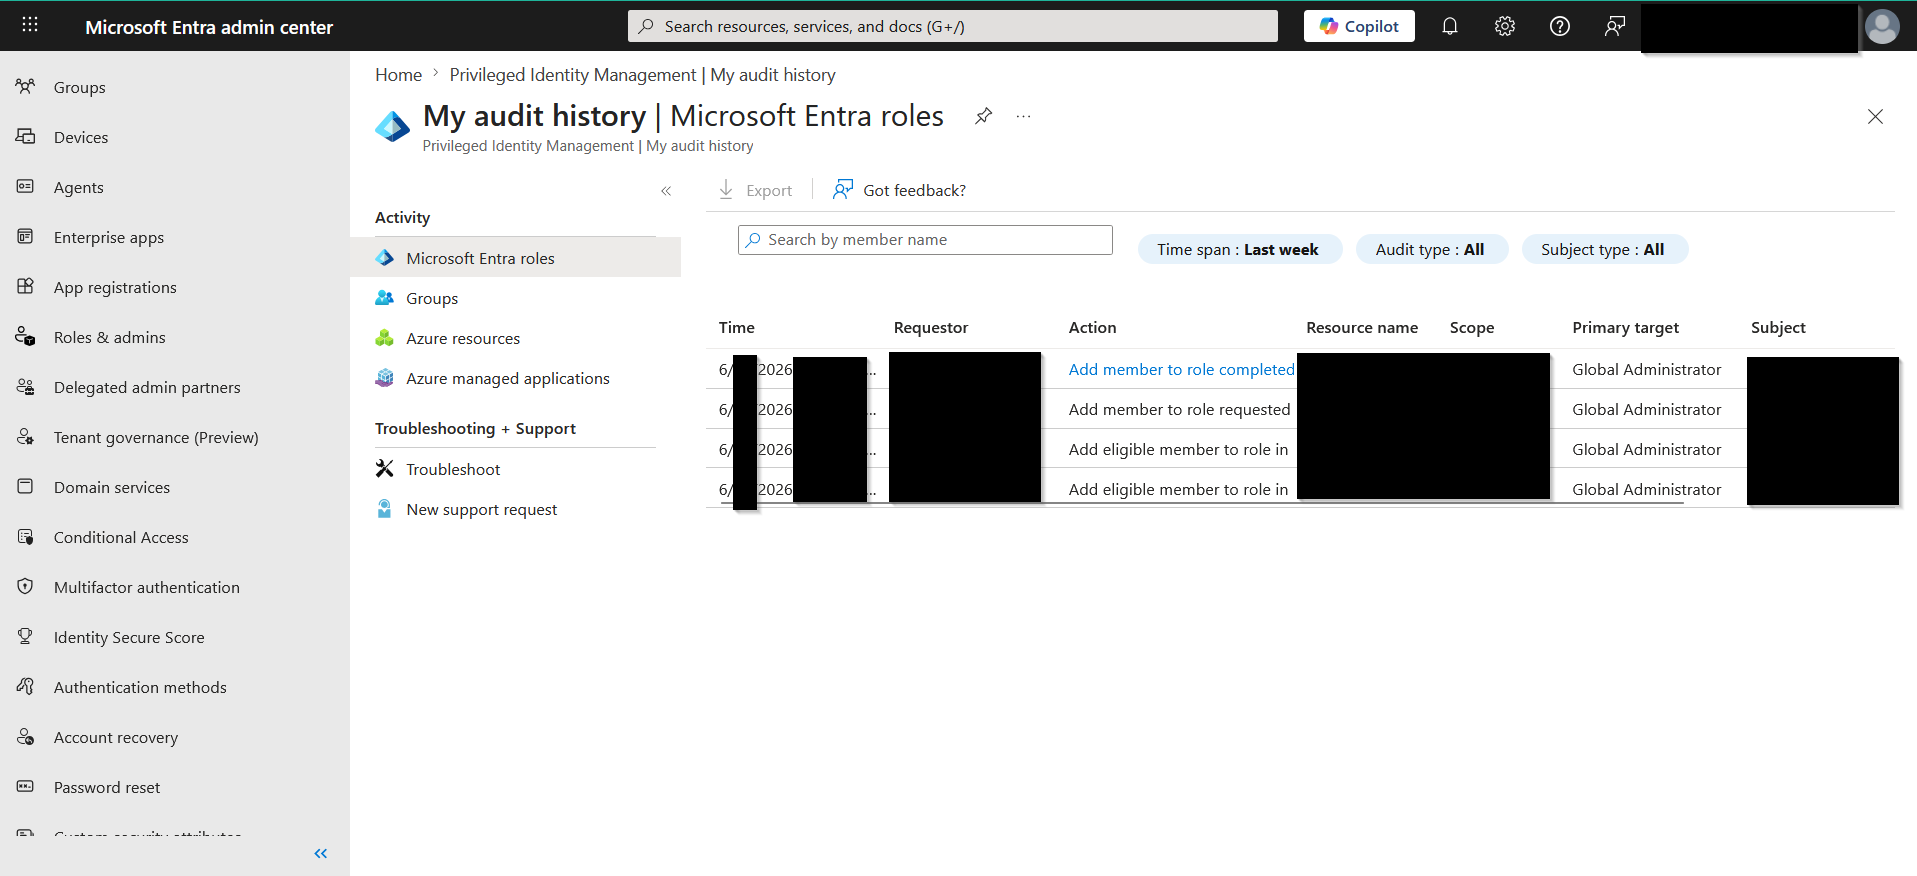
Audit Logs
- Navigate to: Microsoft Entra admin center → Identity Governance → Privileged Identity Management → My Audit History
- Use filters for:
- Role activation (eligible → active)
- Group membership changes
- Policy updates
- Confirm entries showing MFA requirement
Key Configurations
- Dynamic Group Rule:
(user.department -eq "Human Resources") - Custom Role Permissions:
Microsoft.RecoveryServices/*/read - Conditional Access – MFA Enforcement: Admin roles → Require MFA
- Conditional Access – Legacy Auth Block: Block legacy authentication clients
- PIM Eligibility Settings: MFA, justification, activation window
- RBAC Group Assignments: Reader + Contributor via security groups
Challenges & Solutions
- Challenge: Some settings were not located where documentation indicated.
- Solution: Used updated Entra admin center navigation + Microsoft Learn references to locate new menu paths.
- Challenge: Export button missing in custom role description.
- Solution: Captured JSON via Azure CLI / portal alternative views.
- Challenge: Dynamic group membership took time to populate.
- Solution: Allowed directory evaluation cycle to complete.
Results & Metrics
- Identity Structure Built: 5 users, 3 static groups, 1 dynamic group (not including other users and groups created for other Azure labs)
- RBAC Coverage: Reader + Contributor + Custom Backup Reader
- Conditional Access Enforcement: MFA required for admin roles
- Legacy Authentication: Fully blocked
- PIM Governance: Just‑in‑time access implemented
- Audit Visibility: Full logs for role activation, CA enforcement, and sign‑ins
- Operational Automation: Dynamic group membership auto‑populated based on department
Key Takeaways
- Group‑based RBAC is superior to user‑based assignments
- Dynamic groups reduce operational overhead and prevent drift
- Conditional Access is the new perimeter for cloud identity security
- PIM enforces least privilege with just‑in‑time elevation
- Audit logs provide essential governance visibility